Aussiland Hits and Wonders!

Julianne's flag

Julianne’s flag                                                                                                    

Howdy ya’ll!

I really, REALLY want to share this post with all my followers, new and seasoned! My friend, Julianne, has started a wonderful new resource for Australian and New Zealander home based shops. With so many changes in the world market of handmade I find Julianne’s approach refreshing. Perhaps I will follow her lead here in the USA! Leave me a comment on your thoughts towards this all my USA followers ~ Please??

Thanks bunches for reading her post. Even though she’s directing towards our south of the equator friends on her side of the world we can all be encouraged. Read on…..http://aussieshoutouts.wordpress.com/2014/08/19/australian-new-zealand-crafty-homebased-business-opportunity/

Enjoy life. It only gets better!

Bonnie

Houseplants and Helping Hands

Howdy ya’ll!

As usual I’ve been keeping busy with my art. So to give myself a break I decided to work on my houseplants. I don’t just have a couple small potted plants. I have many with LARGE plants growing. Large, that is, for me. I’ve never been known to have a green thumb. I reckon that the older you get the greener your thumbs grow. (hee hee). Anyhow, since I live upstairs I got permission to use the extra area on the landing. Take a peek:

Plants on the landing

Plants on the landing

As you can see, they have come to be quite unruly. There are three or four pots with Mother in Law’s Tongue and Snake Grass. Those are the long leaf ones. There’s a corn plant/tree in the back left too. I honestly don’t know what kind of plant the one is on the wall. I think of it more as a tree. So did my neighbor boy. Seven years old and wanted to help. I was glad for the company.

I want to show you a trick I learned quite some years ago. It is possible to have planters that don’t have holes in the bottom and still grow your plant friends. It’s all in the preparation. You simply need a drainage system UNDER the plant. Yep, down at the very bottom of it all. How?

Check this out:

place rocks in bottom of planter at least 1 inch deep.

place rocks in bottom of planter at least 1 inch deep.

I love rocks. I am always picking up pretty ones I find on my many walks with my sidekick, Daisy. (she’s my dog). Put a good inch deep of rocks in the bottom of your pot. Spread them out to cover the bottom as close to level as possible. Then add a coffee filter on top.

Scrunch the edges real good.

Scrunch the edges real good.

Scrunch down the edges along the side. You can even press the filter down around the wall and the rocks if you like. The filter helps to keep the finer more important additives to the dirt from sifting through. (Shh! The plant thinks this is the bottom of the planter now!). Now, on top of the filter add a piece of round plastic canvas, cut to fit.

plastic canvas into bottom of planter on top of filter and rocks

plastic canvas into bottom of planter on top of filter and rocks

 The plastic canvas can be rough on the edges. The plant doesn’t care. I happened to have some that were already round. I cut off two rows for it to fit. Now you can finally add some dirt. The canvas helps with filtering too. You always want to put the canvas on top of the filter. First the big and then the small, let those silly particles fall. (Hee, hee! I felt like a rhyme).

The neighbor boy enjoyed trimming leaves and shoveling dirt into pots. I let him take home this very pot I’ve just shown. You probably noticed it’s not really a “pot”. I used a food service container. It’s sturdy and plastic so it won’t leak. Thinking children here….

My neighbor with his new plant.

My neighbor with his new plant.

This has pretty much been my day. Fulfilling. Wholly.

Until next time….

Enjoy life as it comes, even in small packages.

Bonnie

Reflections on My Life

He knows my name

Good Sabbath to one and all!

A wonderful Pastoral friend whom I’ve known since childhood inspired me yesterday. He spoke of how he is touched by this song and his inability to finish the song because of his own emotion with the lyrics. A lady in his congregation asked him to sing anyway. Today may be the day.

Here is the video mix. Only shy over 3 minutes long. I lived to tell you. Somebody else did not.

Please watch with an open heart.

Blessings,

Bonnie


Mosey Cottage

Howdy ya’ll! As usual I have been quite busy taking pix, working on my art and crochet, and babysitting my beautiful granddaughter. She recently turned a year old! What’s that got to do with the title, you ask? Oh, just about everything! You see, I always had prayed for a house from my late husband. Well, since his passing, my daughter and her little family decided to use some of the monies to buy me a house! There’s a story here too but it needs to wait for another time….

Mosey Cottage. A name to memorialize my late husband whose nickname was Moe. A name to depict the house. A house for an artist. A house that’s only a “mosey” away from the granddaughter. No “over the river and through the woods” here!

Mosey Cottage

Doesn’t look like much from the front. My son in law had mowed and consequently moved the step off to the side. This is what’s called a “shot gun” house. Narrow and long. Each room is as wide as the house and follows the next in line. It has/had a garage with a breeze way between. Every bit of that is now part of the house.

The south Side

As you can see, there is a LOT of work to be done. I am looking forward to getting started on the landscaping which doesn’t exist as of now. I did manage to plant my nearly dead irises next to a badly rusted clothesline pole. The other flowers are yellow lilies that are common here. Provided my son in law hasn’t mowed these I am praying they live.

My poor transplant of irises

I am not living here yet. The house had previously suffered a major water break. Hence the entire center of the house has mushy floors. Also, since the house was built circa 1940, it needs electrical updating.

Would you like to see the inside? Or part of it? When the kids bought the house the contents were part of the bid. There’s a houseful of furniture, dishes, linens, and even toiletries and clothing! The lady had died in a nursing facility and the family just didn’t want the house or her things. Sad, really, both for the lady and for me. My kids aren’t allowing me to keeping anything!

Glimpse of the Bathroom

The bathroom was poorly planned. No room for two people for sure! Kids tell me that they are going to update perhaps with a new tub. Definitely new plumbing!

Sad bathing

Yep. Even the bathing stool and potty hat were left behind. GROSS!!!

The place I plan to spend all my time is NOT in the bathroom! Haha! Since the garage is enclosed with both interior and exterior doors the kids say they are making me a dream come true! I get to FINALLY have my own crafting workshop/artist’ studio! I’m so excited! Especially since THIS is what it currently looks like:

Garage Dreaming Of course, this is only a partial view. It only shows about half. Or perhaps a third. As you can see there’s a LOT of items left to sift through and sell. This picture is lighter than what the room really is because I had the outside door open. It’s actually much darker and depressing. Hopefully I can get a bigger window. I’ve got my fingers crossed!

And so Mosey Cottage starts with a hole. Not Whole yet. But I am soooo looking forward to sharing the progress with ya’ll!

beginning work full view

Until next post I pray your life is wholly full of life and love and whimsy.

Enjoy!

Bonnie (aka Peabutton’s Mom)


Keshia’s Kakes on Super Bowl Desserts

This is SOOO good! I just have to share!

fashionablyfoodie's avatar

Super Bowl parties are all about food you can eat with your hands.  Fussy cakes and pies are for another occasion.  When it comes to parties like this,  your guests will be grazing throughout the evening, so having food you can leave out for a bit, is easy to eat, and portable is key.  These little Football Peanut Butter Truffles will give your guests something they won’t forget in one tasty bite.

Football Peanut Butter Truffles

Ingredients

½ cup Peanut Butter

3 Tbsp. butter, softened

1 cup sifted powdered sugar

8 ounces chocolate-flavored candy coating (Wilton and Nestle make these, but be sure to buy something labeled for use in candy.  Not all chocolate is created equal.)

¾ c white chocolate chips

Directions

1. In a mixing bowl stir together peanut butter and butter. Gradually add powdered sugar, stirring until combined. Shape into 1-inch football shapes; place on waxed paper…

View original post 595 more words

DIYdea for the Artsy/craftsy

Hey Ya’ll! Been missin’ me yet?  Me too!    🙂

I’ve been really busy working on new art ideas. I am an artist and also quite crafty.    😉    I have been working more with my paints recently. In my artist world I came upon a fantastic little quart (or so) bottle with gesso. The art store I bought it from bought these jugs and filled them with gesso. That way a customer could come back in for refills of gesso! Clever! In my own starving artist need I decided to just buy a gallon of “Kilz” style primer and fill the jug myself. After many, many times of use this jug would build up the primer on the screw rings and lid thus becoming nearly impossible to open!

Image

I’ve had the jug long enough that the lid attachment finally broke. Can you see what I mean about the buildup?  Well, recently I had an epiphany. Honestly, I get tired of scraping that stuff off the rings with a sharp knife. AND I really don’t know why I’ve never thought to do this before!  I use plastic shopping bags all the time under my artwork while I’m painting or gluing. Much less expensive than wax paper!

Image

Now I want you to know I’ve seen people do similar with gallons of house paint and such. It just never dawned on me to do the same thing on the smaller paint bottles and jars! AND this is MUCH less expensive than saran wrap too! Looky here:

Image

I simply cut a piece of plastic shopping bag big enough to fit plenty over the opening. Since I already use the bags for everything else I figure why not this?  TADA!!  It works!

Image

It works like a dream! Each time I open the jug, I like to pick up the “gesso” that’s on the plastic cover with my paintbrush so as not to waste any.   Yep, I can be overly frugal sometimes. However, frugality is not necessarily needed with making plastic covers for the paint bottles. Just throw the cover away after opening and apply a new one each time. With the shopping bags being abundant in the USA it’s quite easy to acquire a pile of them in just one trip to the store! I’ve since cut numerous squares of plastic to use on this jug. Just clip with a clothespin or small binder clip and stash in your art box.   🙂

I hope my little light bulb moment helps you too! Have fun being creative. I definitely do!

Until next time ~ Enjoy!

Bonnie

DayTrippers

Greetings friends! Have you missed me? I’ve been out and about with family recently.

I grew up enjoying weekly “Day Trips”.  As a child my family usually took us to see extended family. Sometimes we would spend an entire day picnicking and hiking at any number of state parks within a two hour drive. A few times dad would drive even farther to an amusement park or a special zoo attraction. After I became an adult I continued this tradition with my girls. And now that my girls are grown, they are continuing our family tradition with their friends and family.

Recently I was treated to one such outing by my oldest and her fella. Travelling a bit closer to home, we visited Merom, Indiana, and the park known by locals as “Merom Bluffs”.

Image

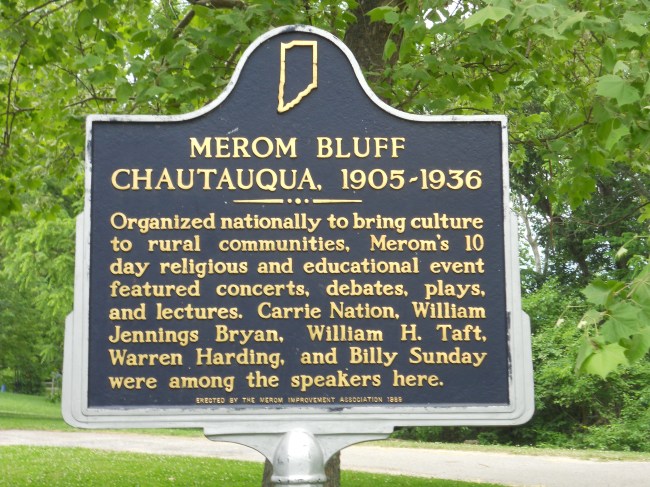
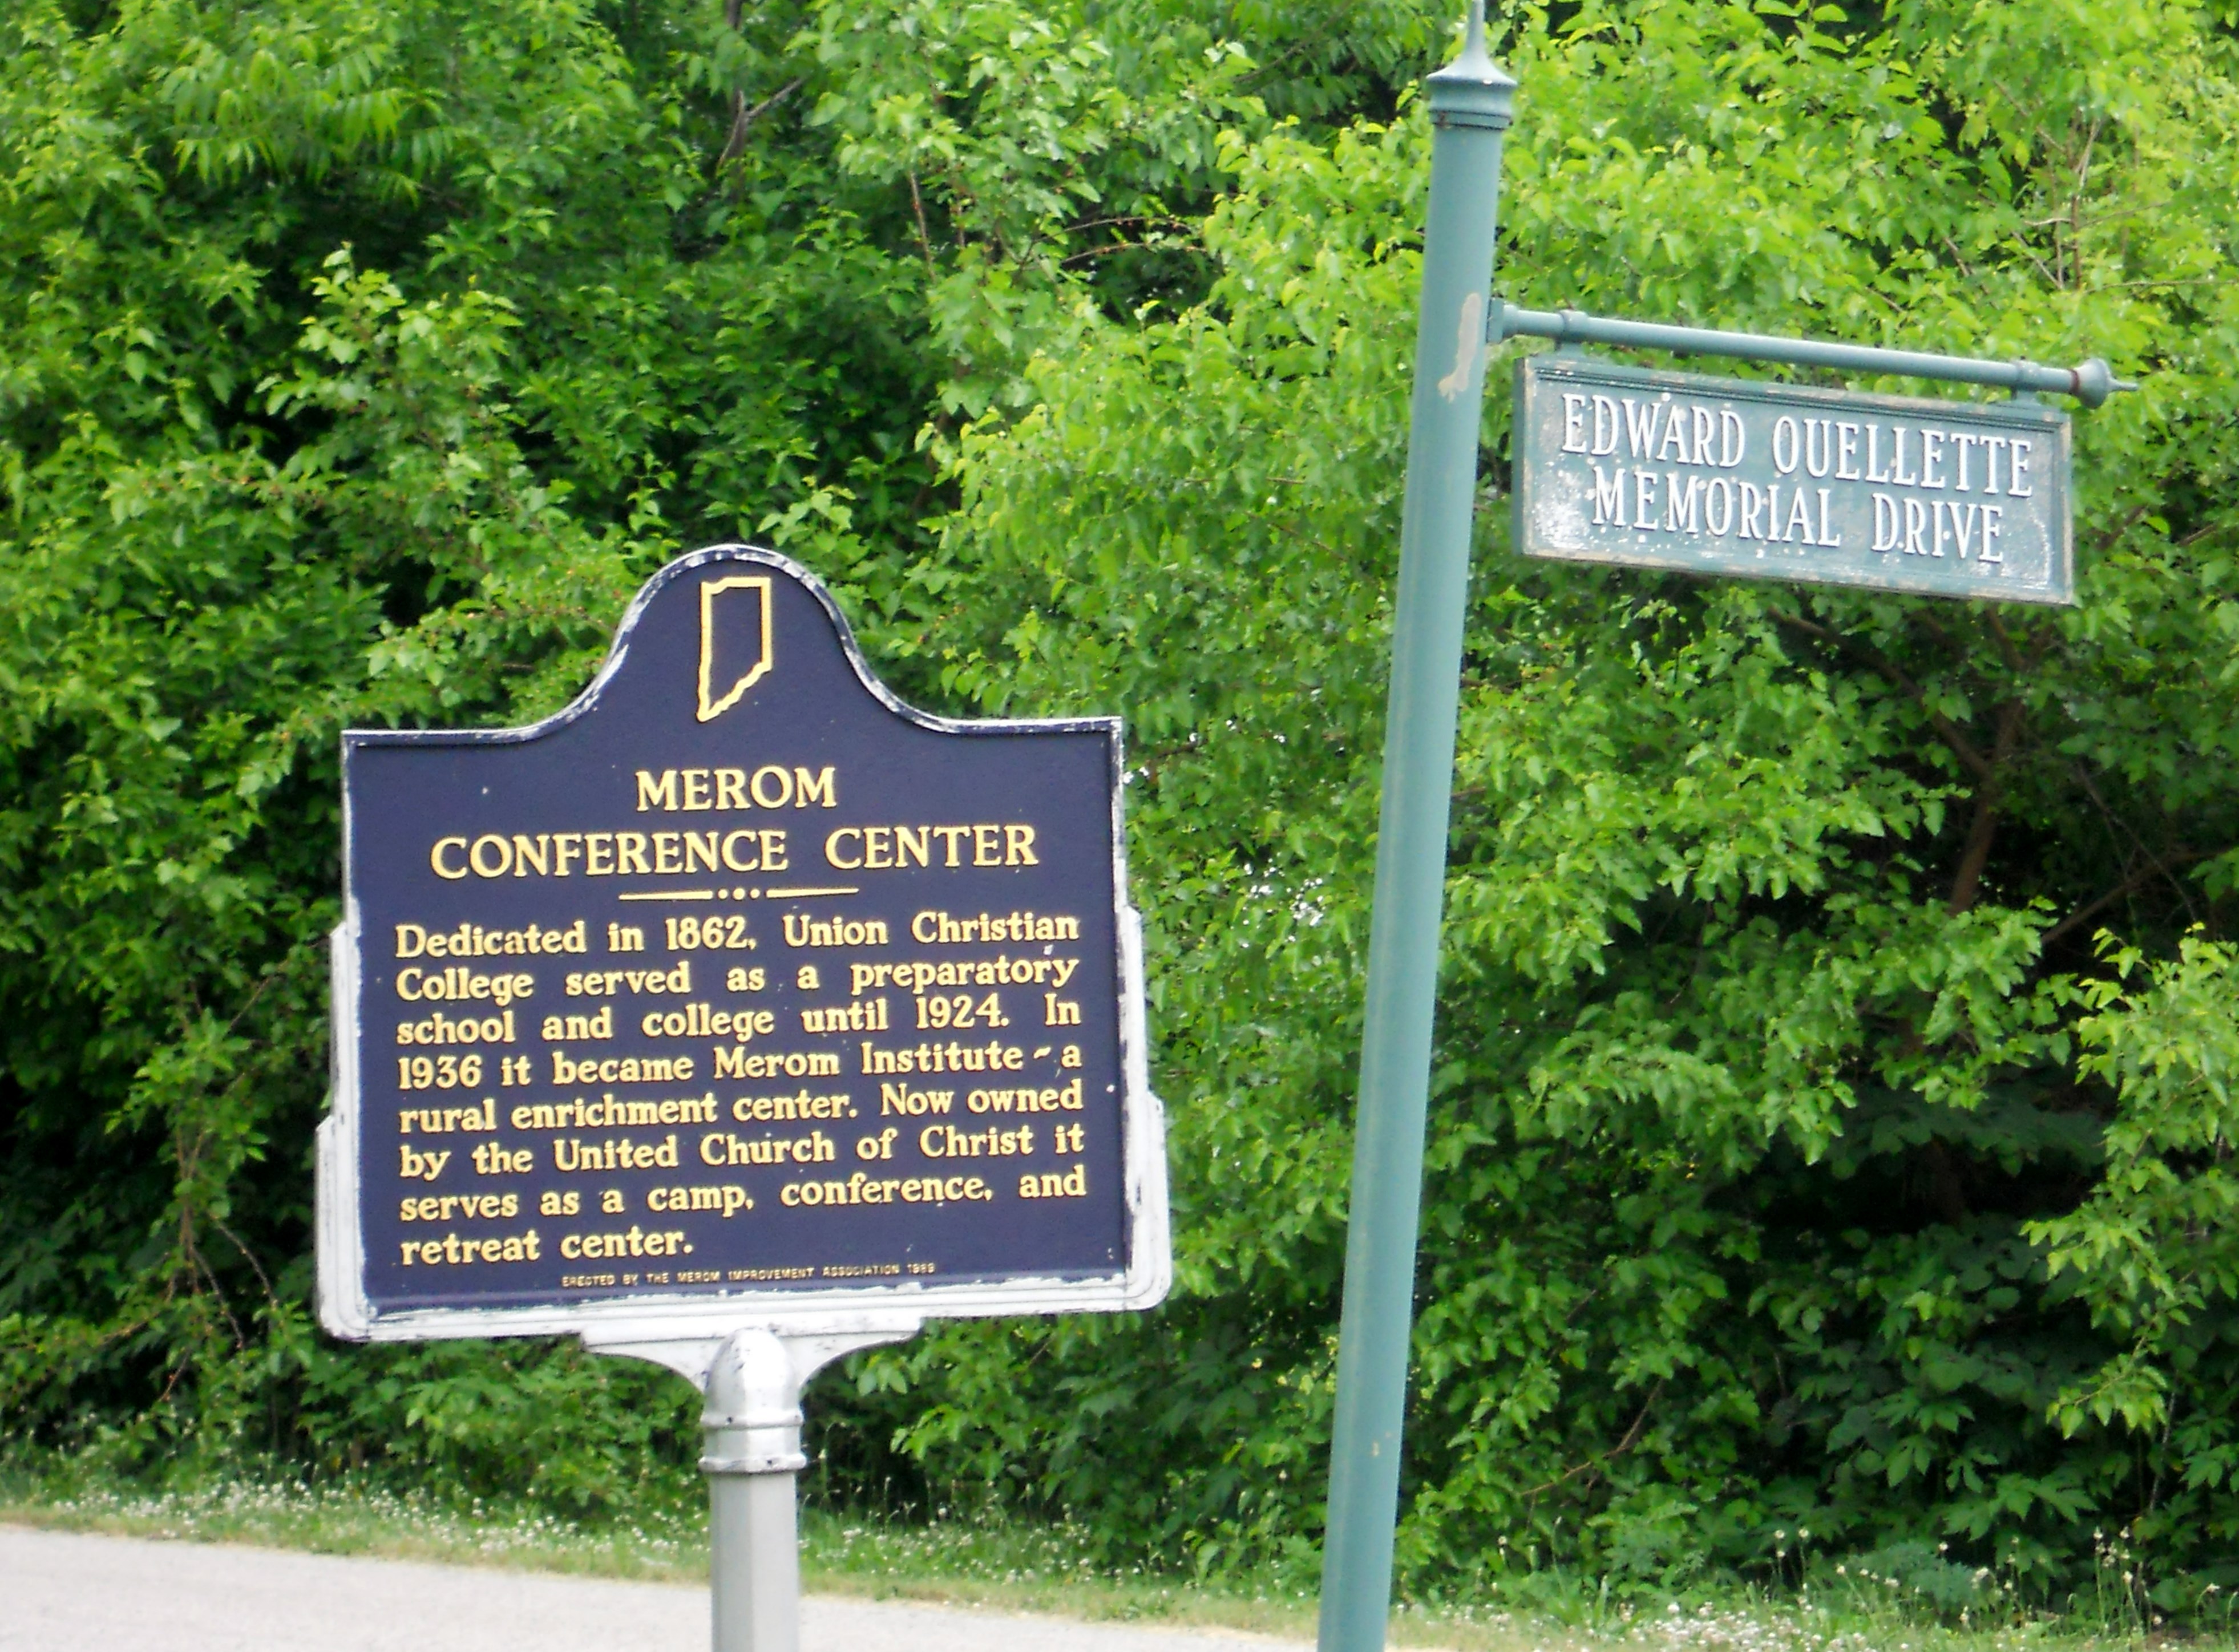
There are numerous historical signs like this all around the area. Merom sits on the banks of the Wabash River. It is rich in American Indian history, Christian history, and, as you can see, cultural and even political history! The 10 day Chautauqua festival has since been whittled down to a weekend event. We showed up prior to the event.

Image

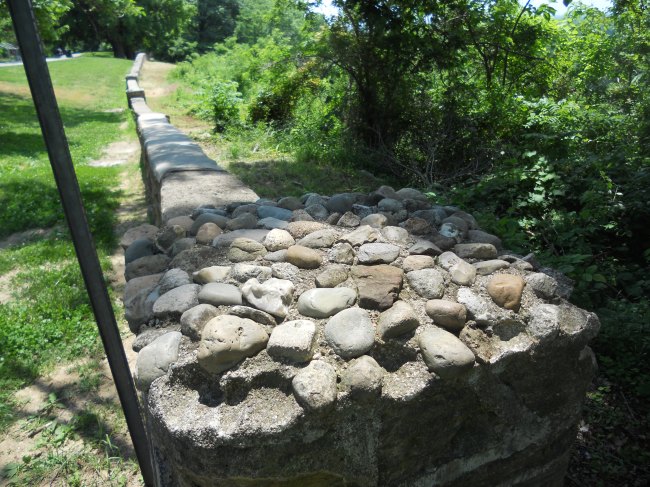
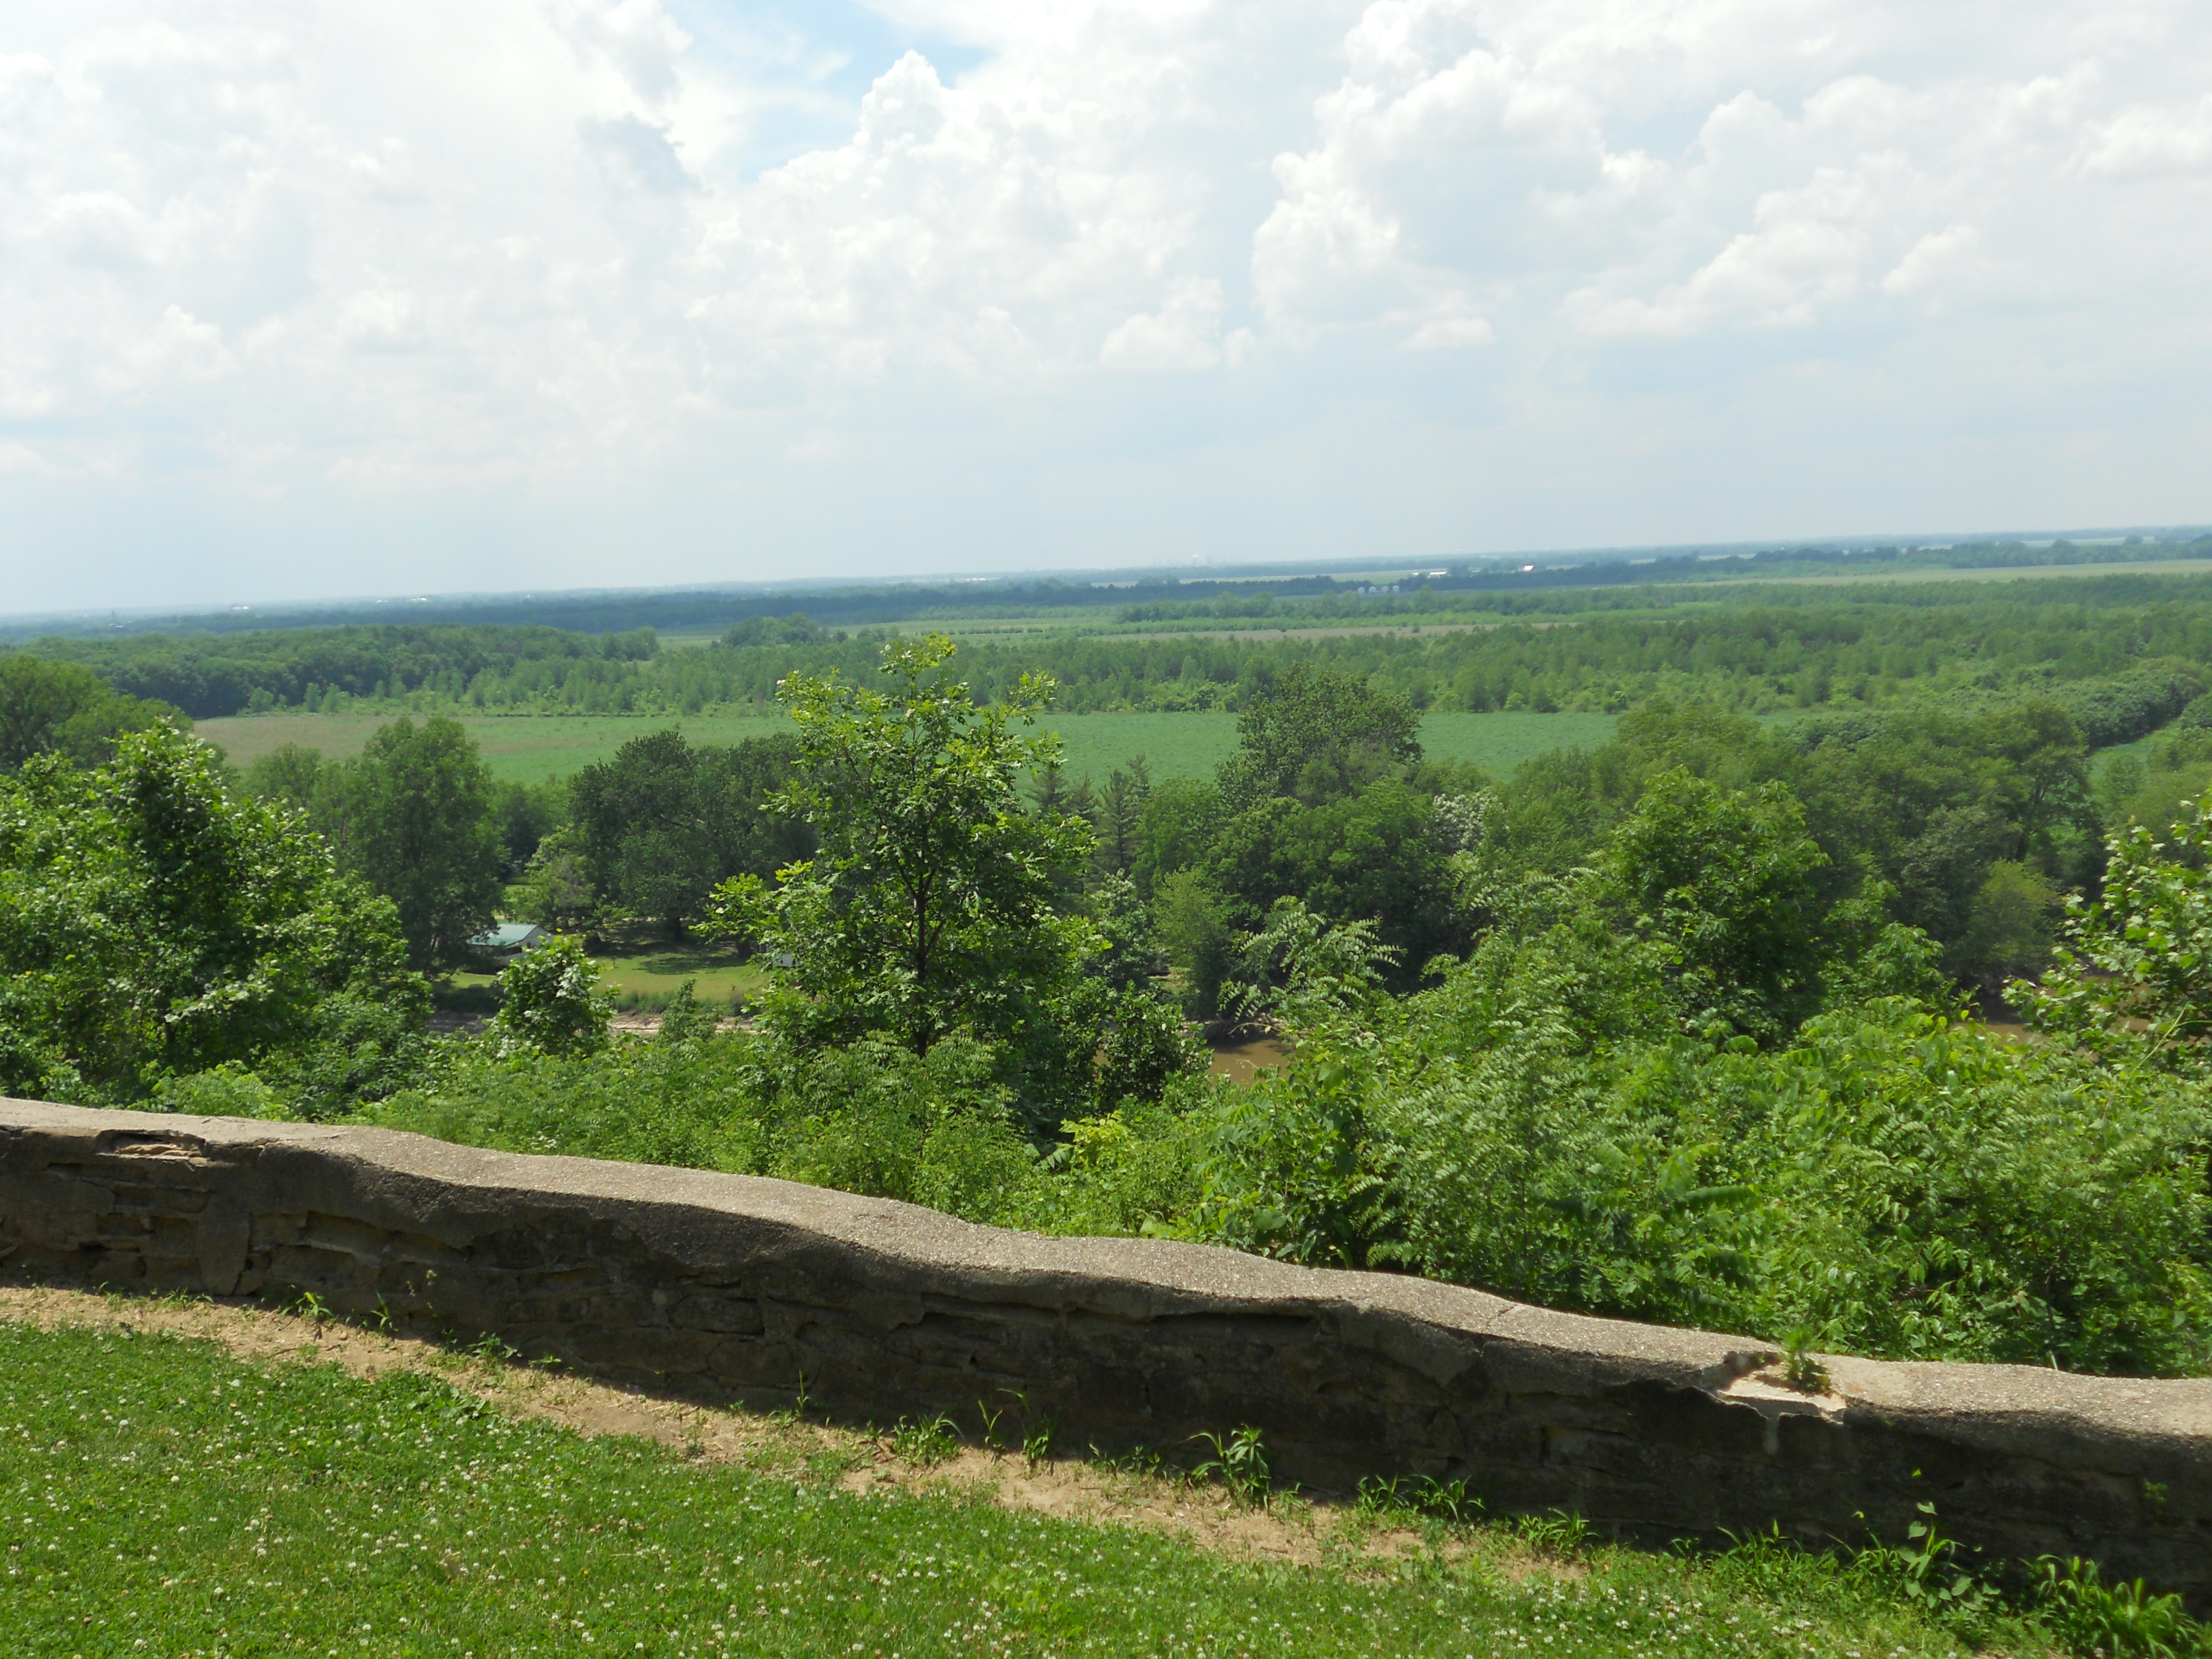
As mentioned before, we went to the main attraction here:  Merom Bluffs. The actual bluff is what we went to enjoy. I have no idea how old the wall around the bluff is…you can see some places where the wall has been mended and other places where it’s rather broken down. Not really a safe place for children, the elderly, or drunks 😉

Image

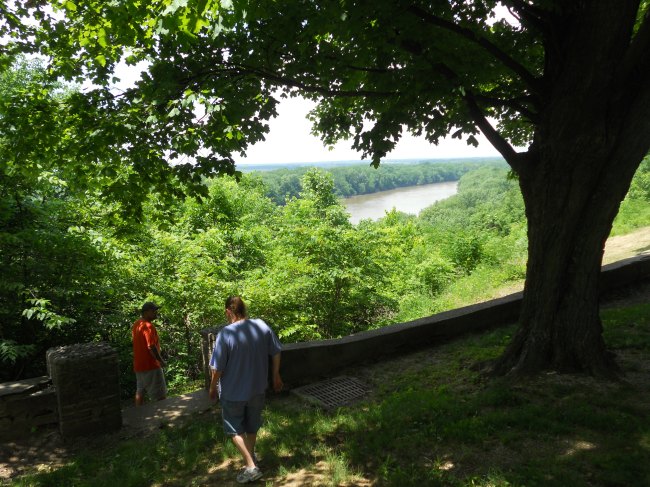
We considered this entry point to the bluff. It was quite broken down so we decided to take another route.

Image

The tree in the right of the last photo is the same one seen at the top and left of this one. That’s the Wabash River in the distance and Illinois just beyond that. This photo is looking slightly north-north west.

Image

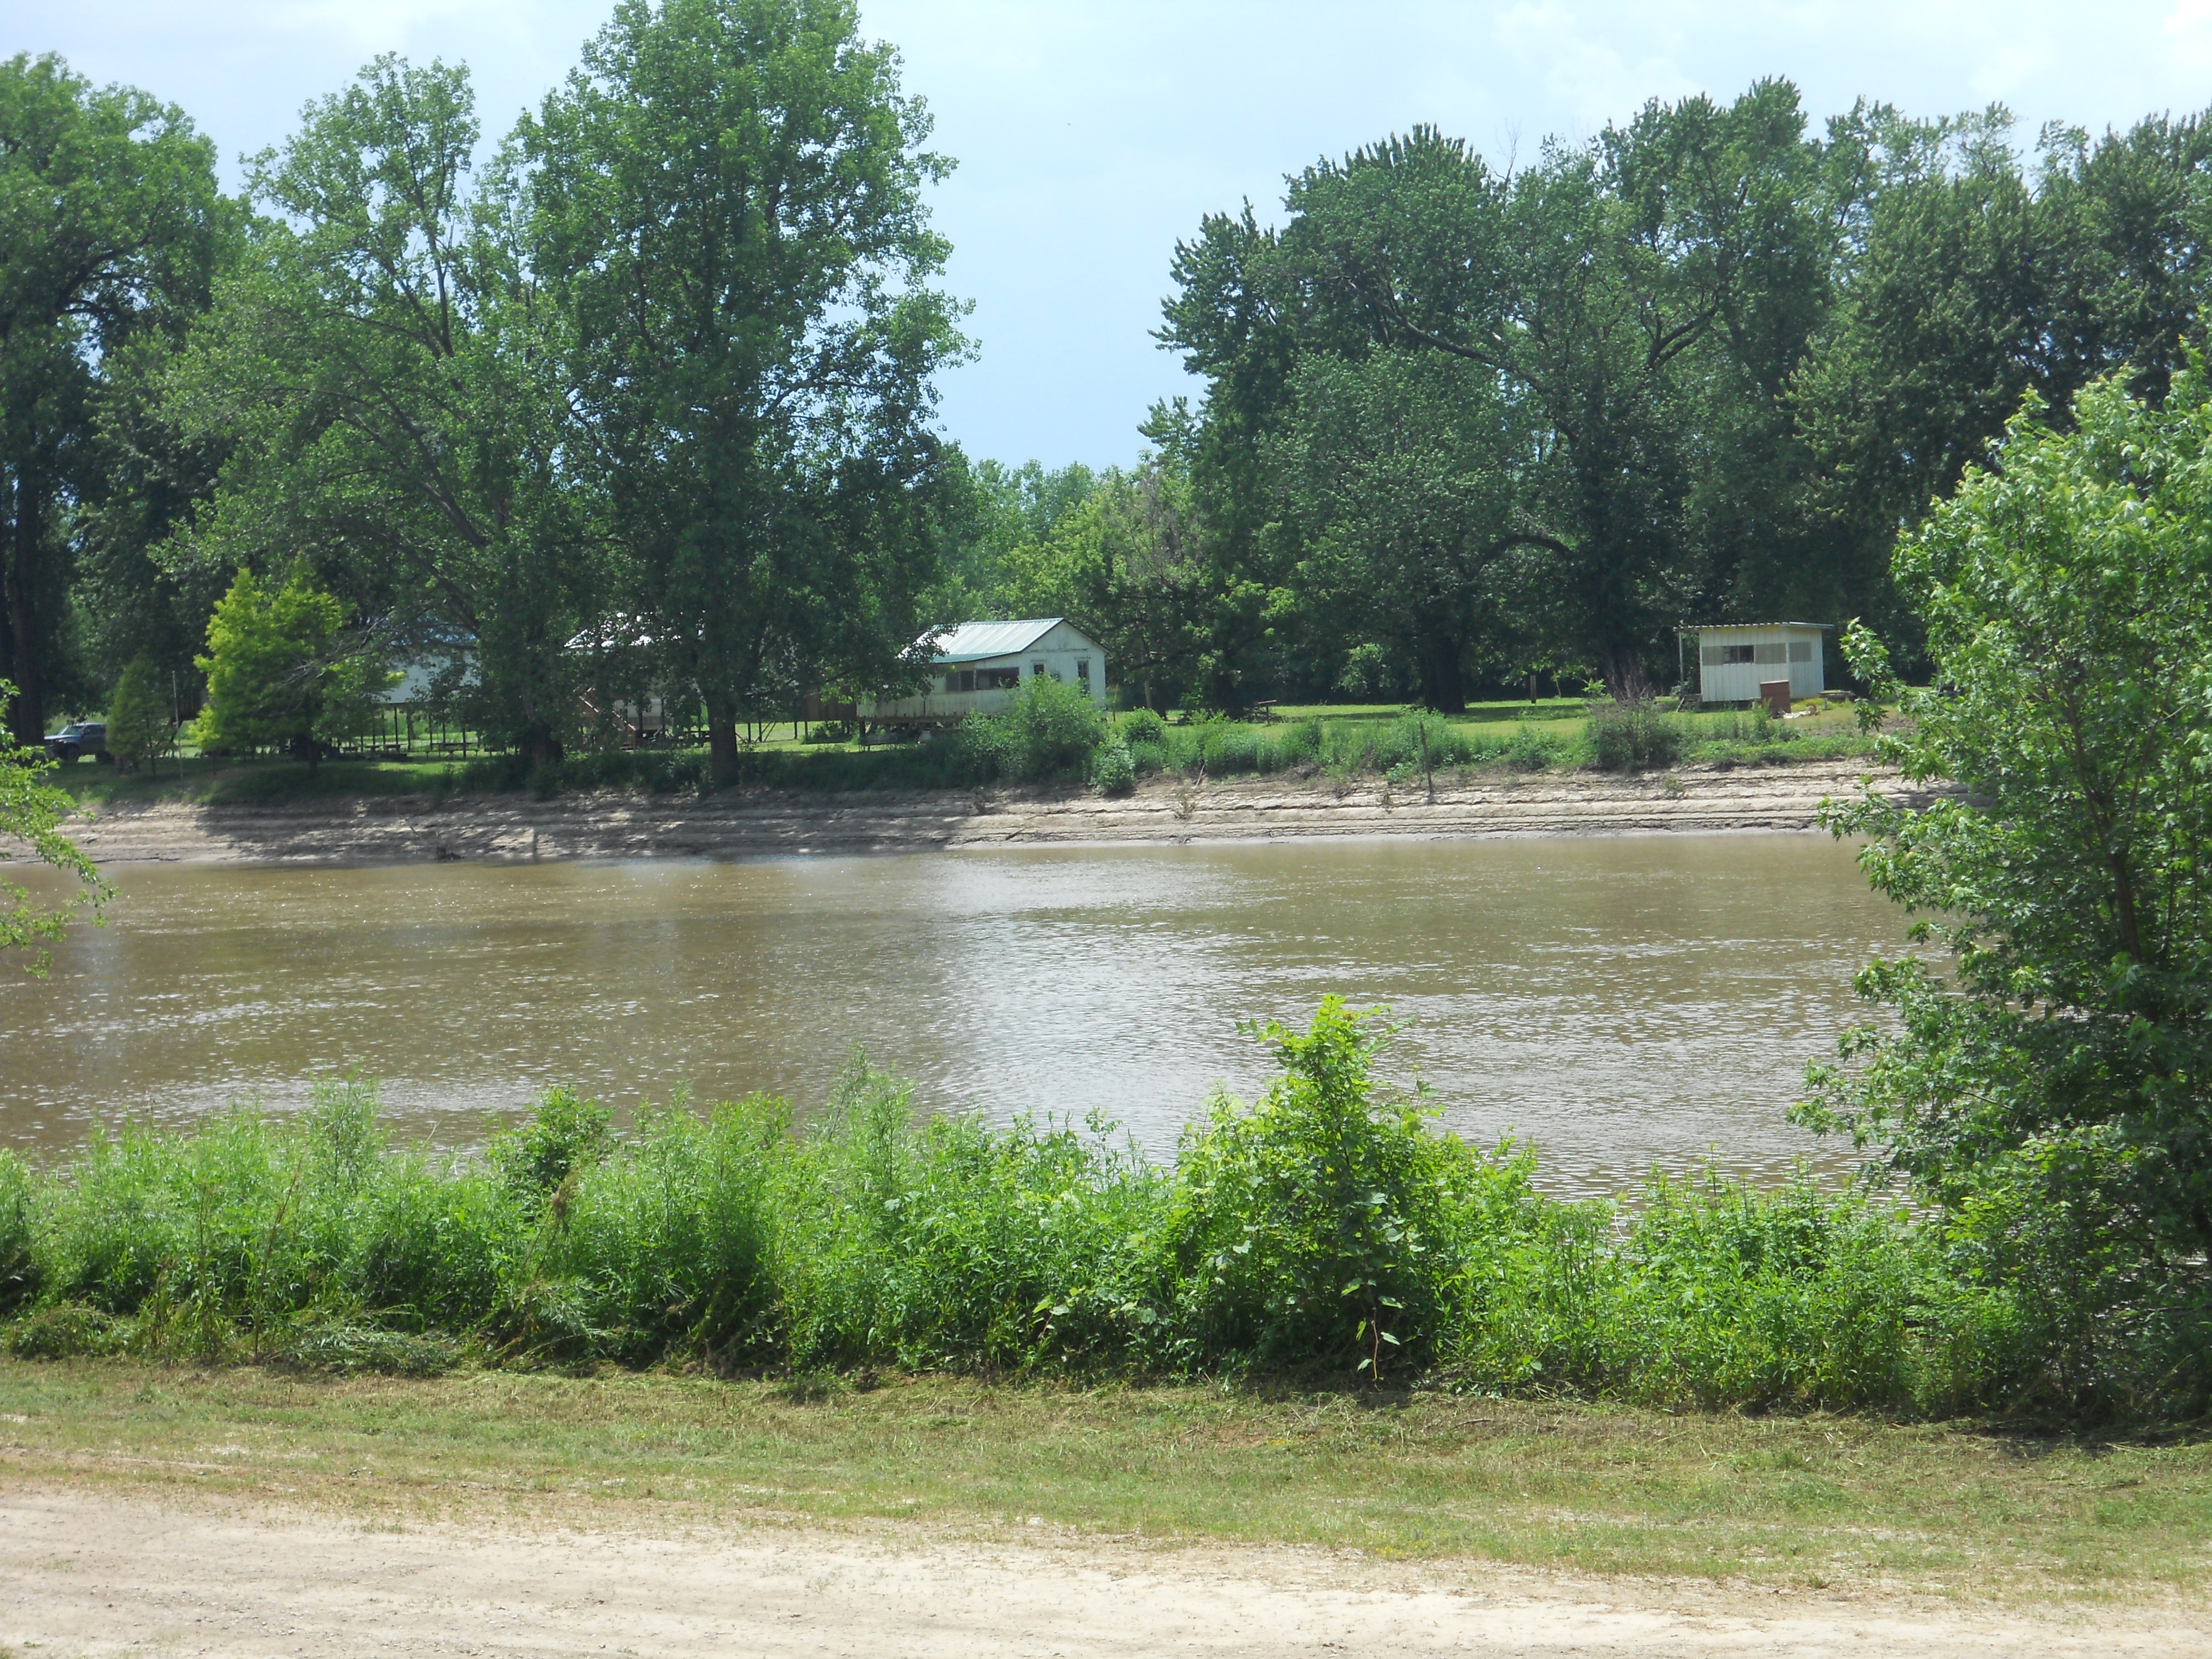
This is about the center of the wall. I tried really hard to get a good picture of the horizon. I could barely see the stacks at the refinery in my town. Not as the crow flies (because I’m no crow) the distance is well over thirty miles to the horizon. Probably a bit more like forty.  As you can see, the sun is shining but it’s also cloudy/hazy. You will notice in the next few pix there is a storm rolling in…If you look really hard you will notice a building just to the center left in this photo above. I will show you the same building in a bit.

Image

Here’s a view back to the south along the wall. I had forgotten but this was a military wall during the civil war!!!

Image

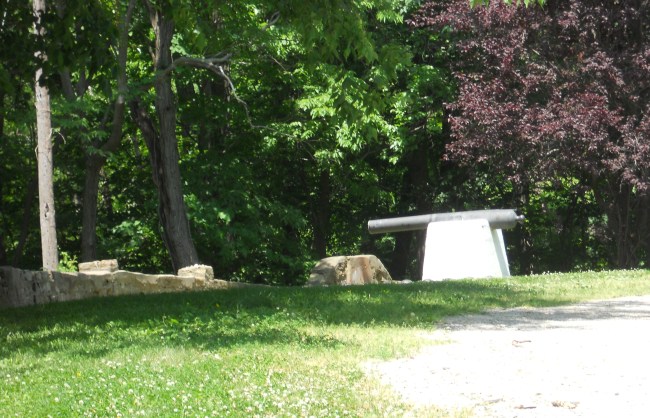
One of the original cannons! It’s actually a pretty good walk to see this too. I had to use zoom just to see it this well.

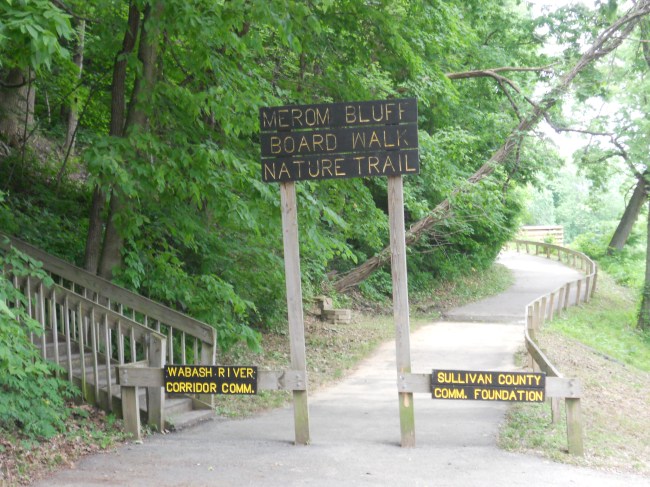
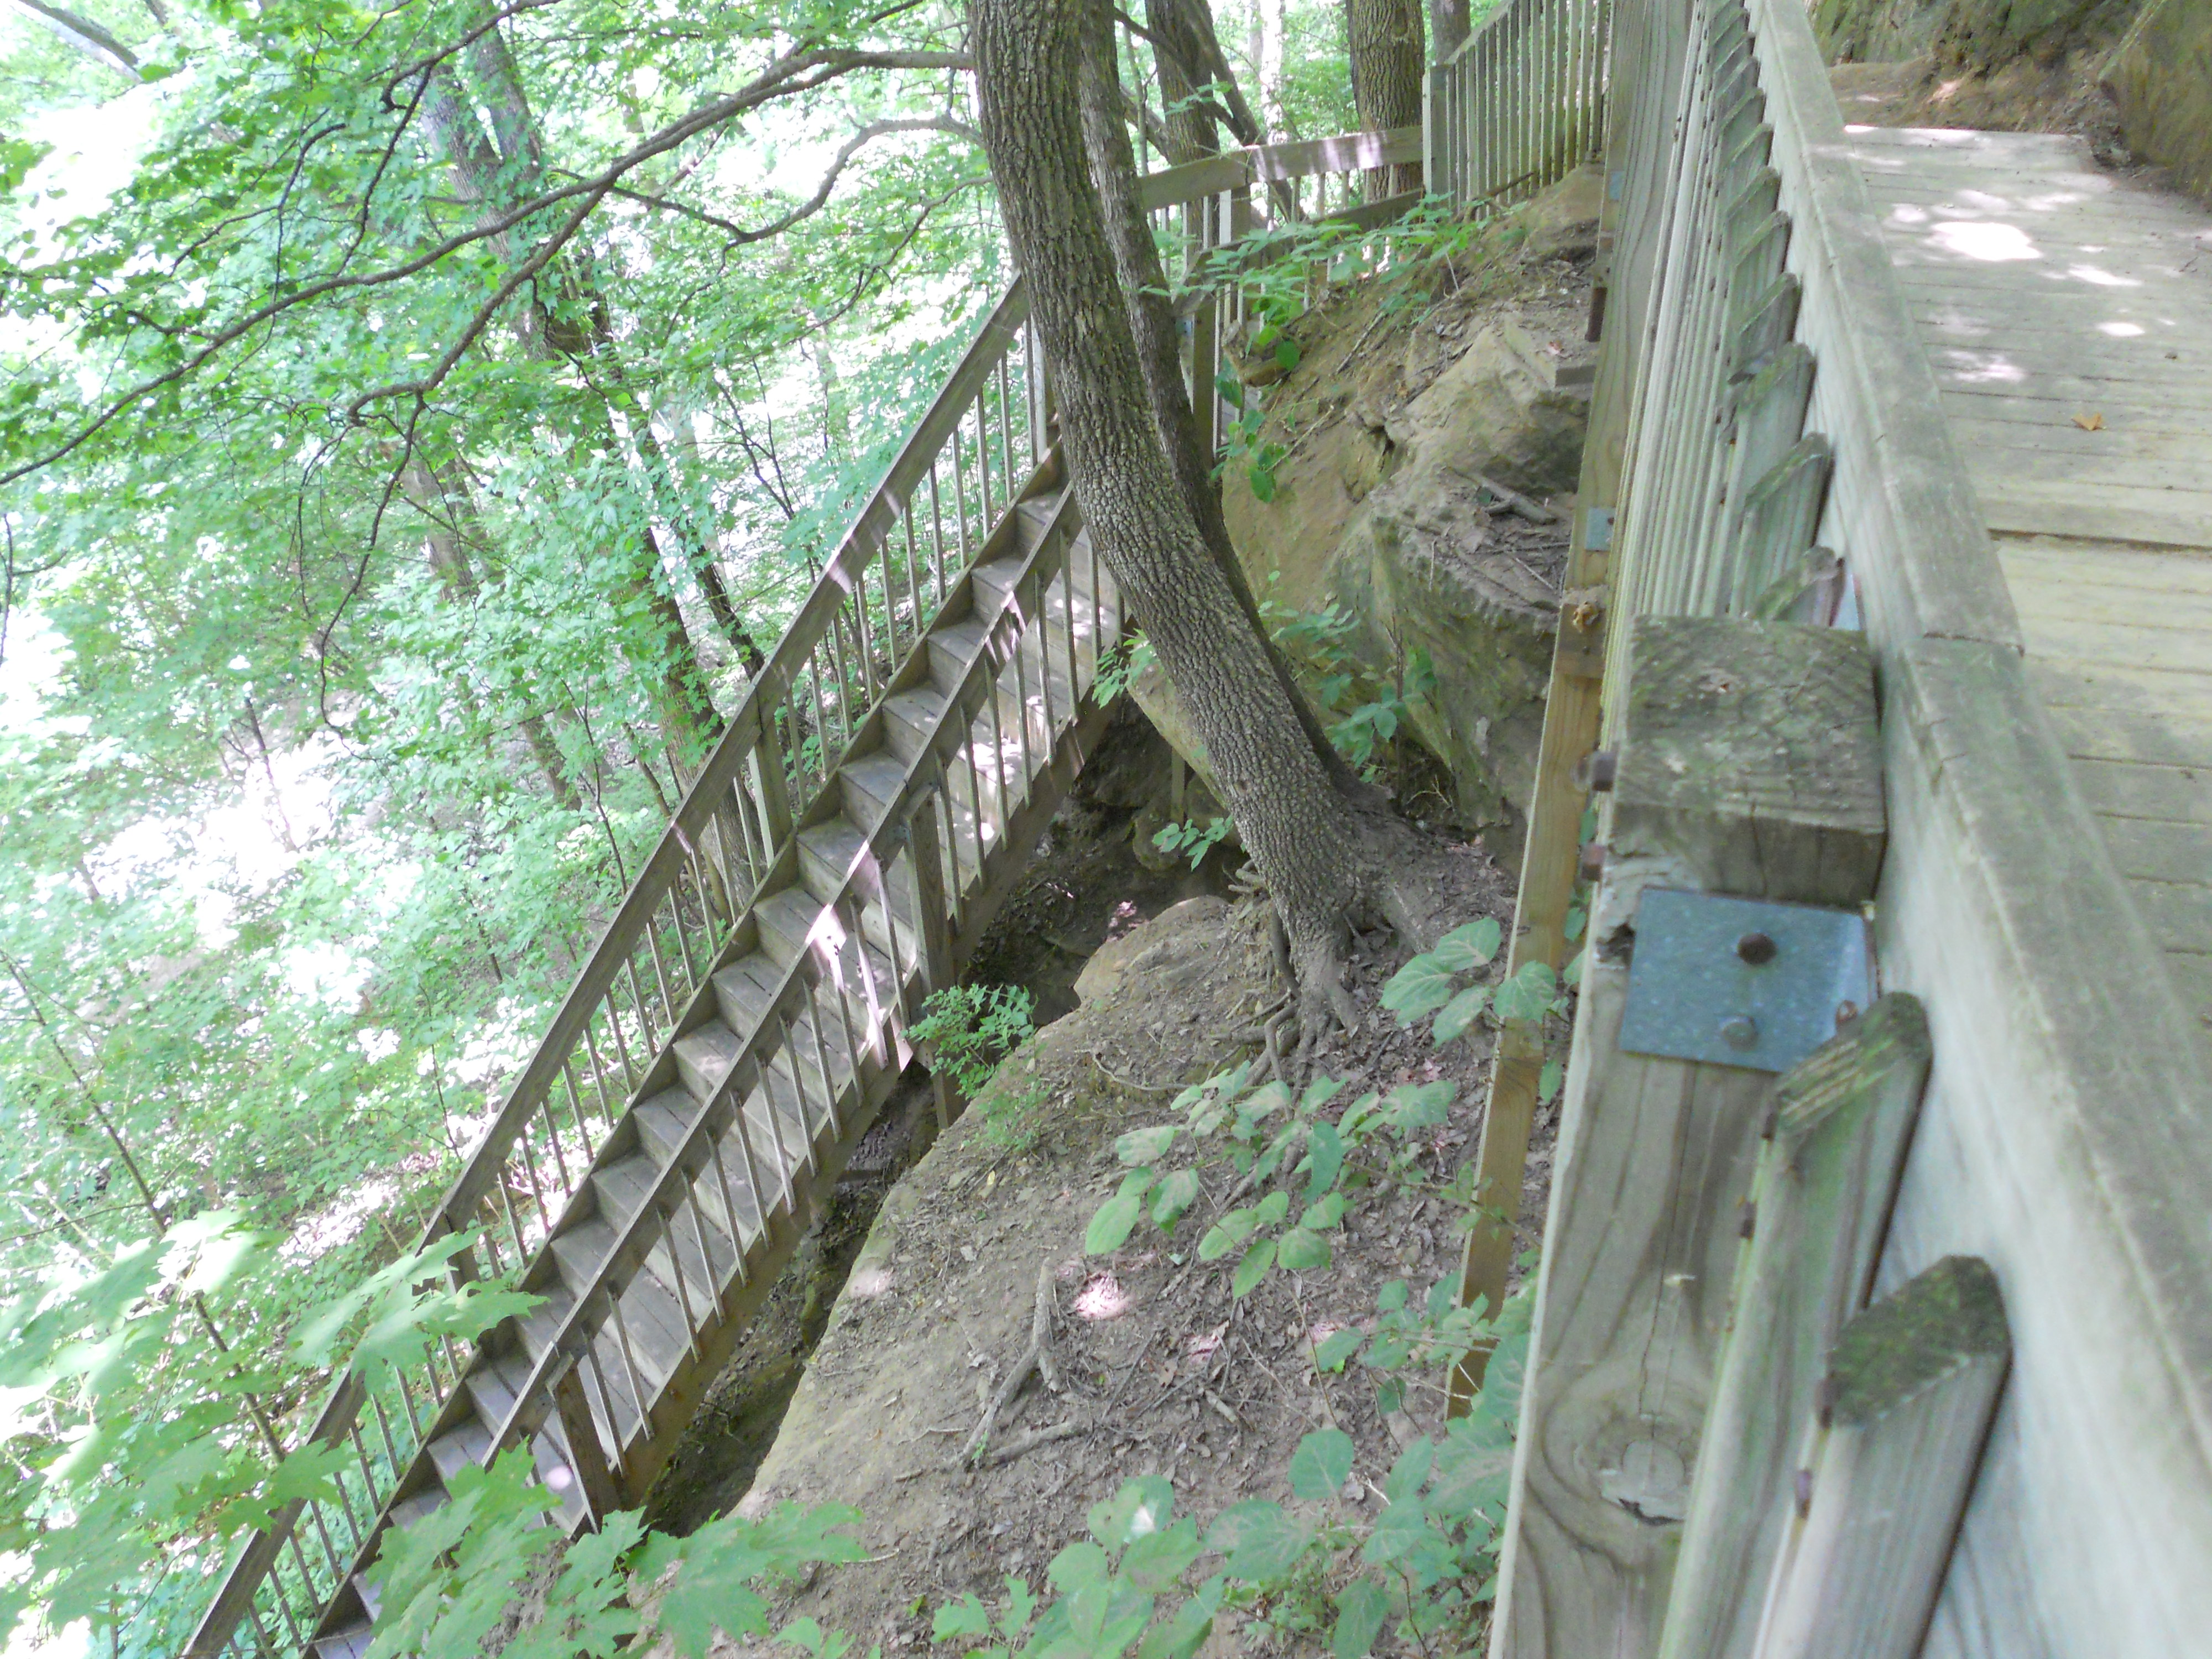
And FINALLY, we find a relatively new bridge and trail! This had never been here in times past for my visits.

Image

And so here begins a hike downwards to the river. I will share several pix to show how steep this hike was for me. Image

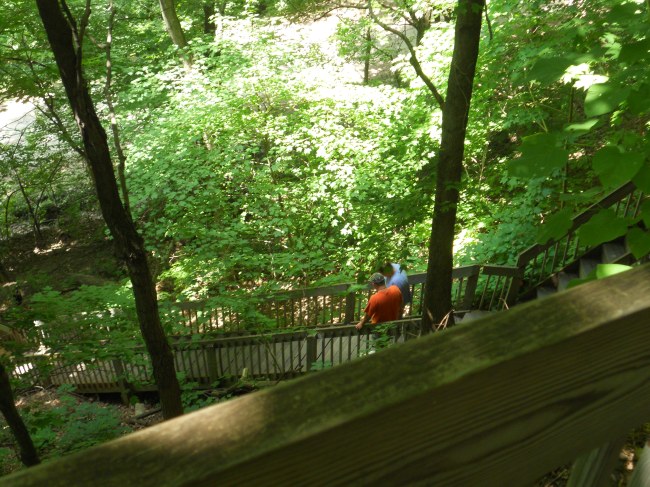
Doesn’t look so bad yet? Alrighty then…I DARE you!

Image

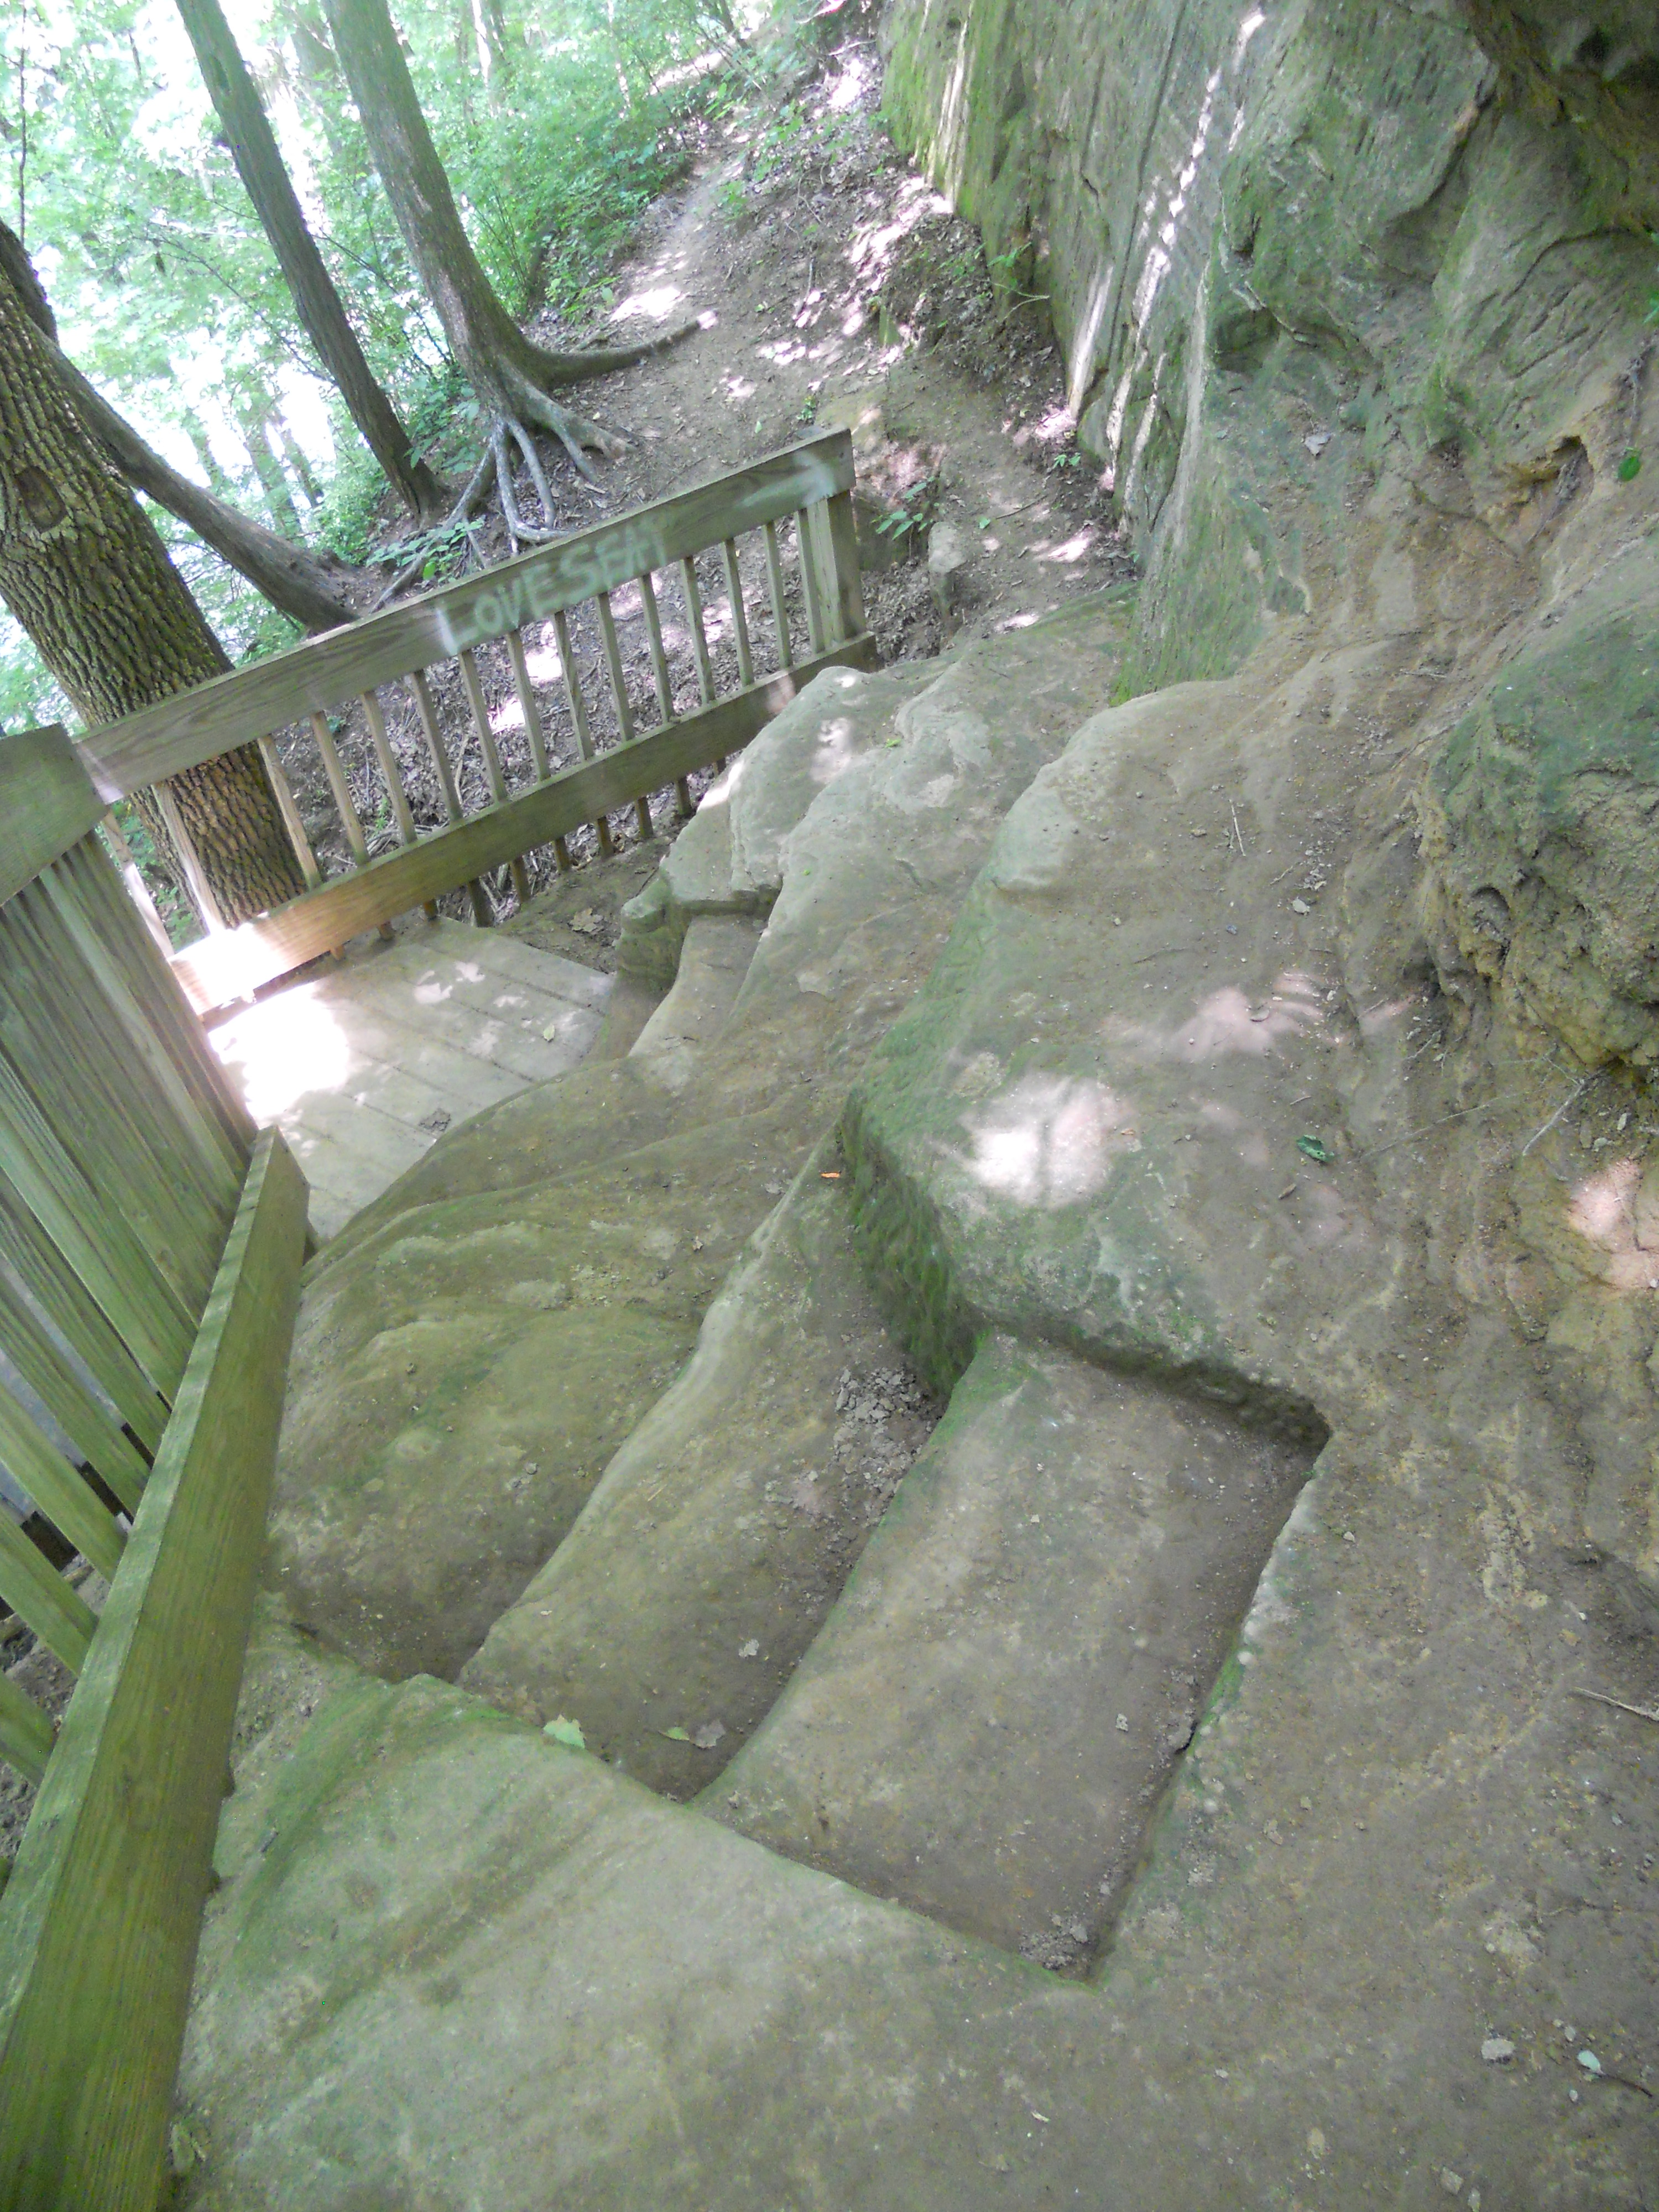
Well, well…hmmm….and this isn’t even the steepest part!

Image

Yes, this is carved right out of the stone in the bluff. STEEP! My rump got real familiar with this set of steps 🙂

Image

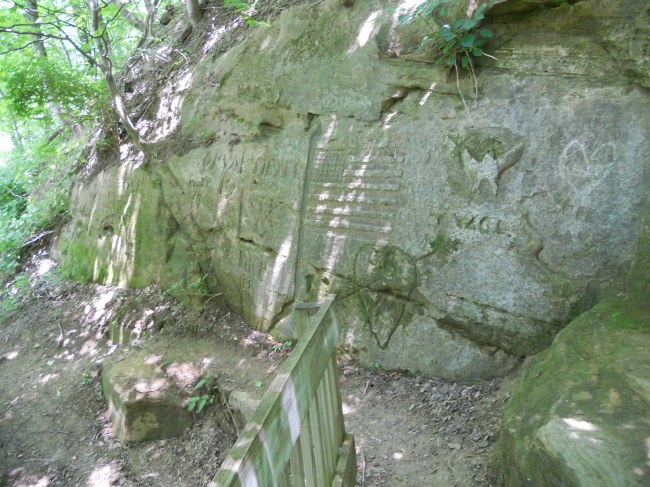
Here is evidence that some form of this trail dates back an incredibly long time! Rock carvings! Yeah, some is “new” but you could also see evidence of some very well worn carvings too. I’m going to guess that this is at the halfway point.

Image

Looking back up into the dizzy view. Still on the trail. the stairs rather disappear into the upper right of this photo.

Image

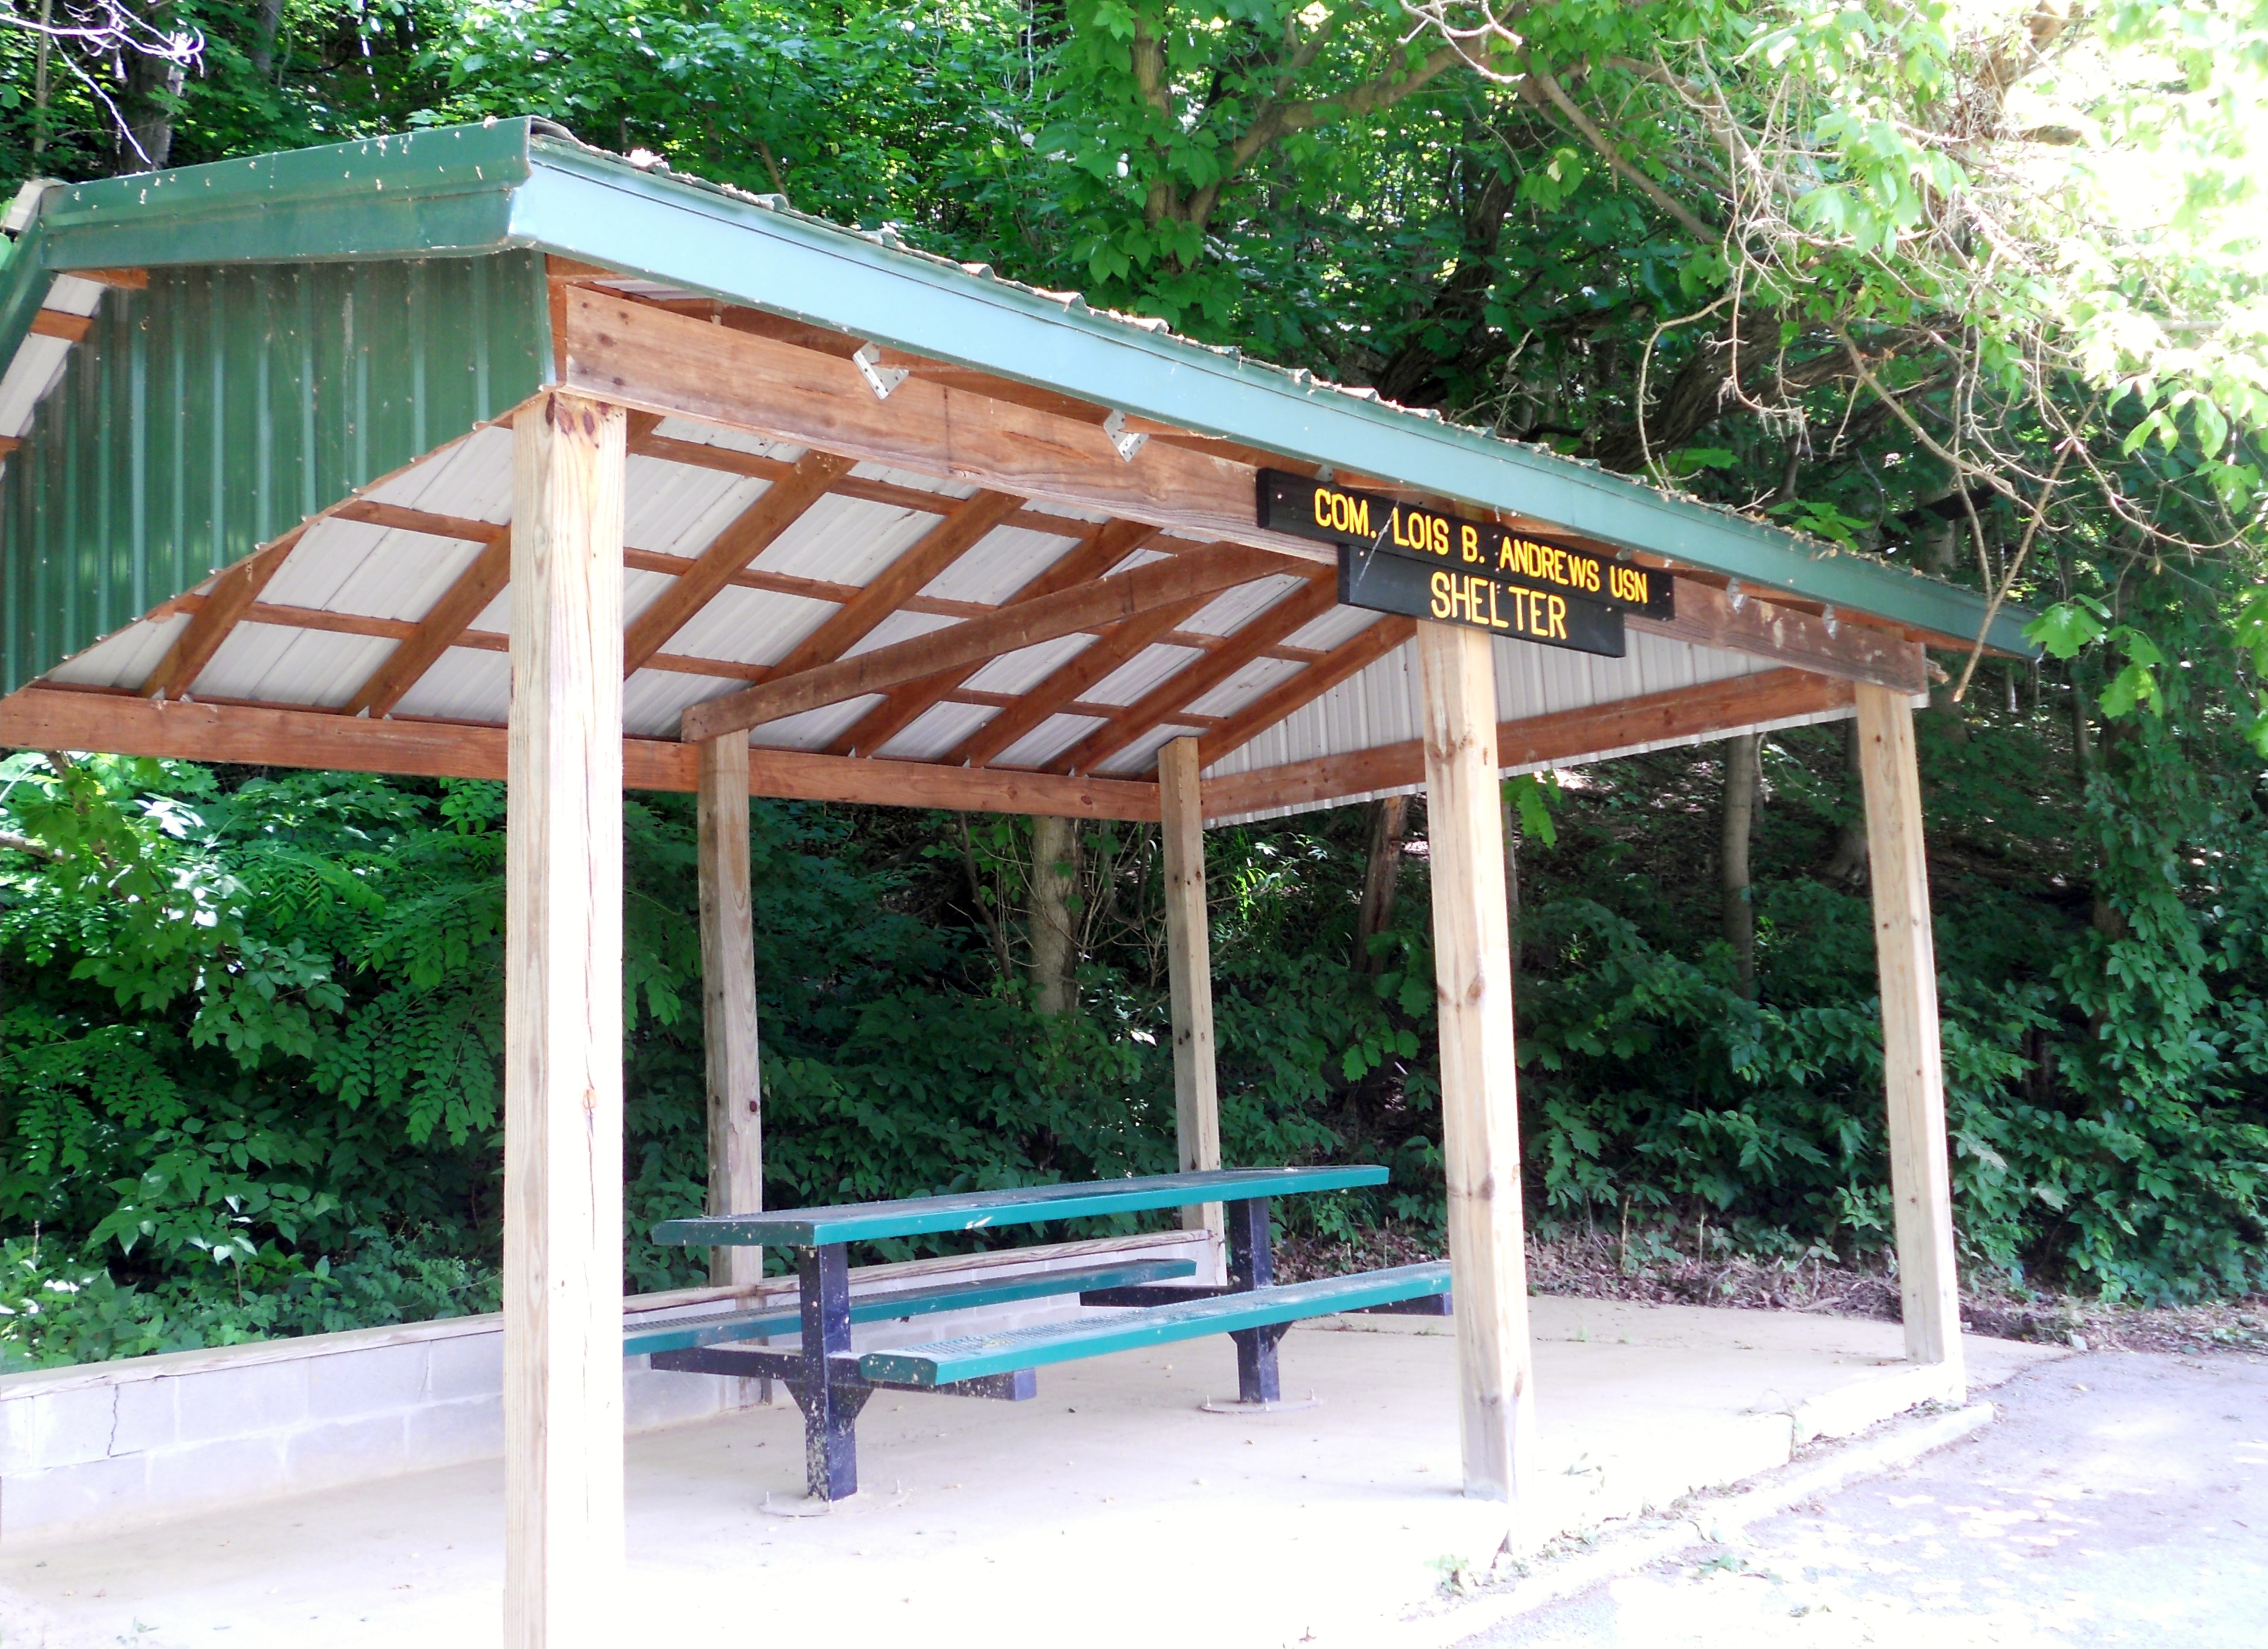
HAHAHA!!! The stairs on the left here only go to a shelter house with a picnic table! Where we came out was in the far distance!

Image

This shelter sat a bit closer to the actual ground!

Image

Remember the building I said to notice before? Here it is again, just across the river, at the bottom of the bluff.   🙂

Once we DID get to the bottom, I realized there’s a ROAD that you can take to get to the bottom! Sheesh! My legs felt like jelly rubber bands so I made the kids hike back UP the bluff, get the truck, and come back for me.    🙂 

After regaining ourselves a bit we drove back around town to the only other attraction.

Image

I thought this history sign was placed rather close to the street sign. Made for an interesting photo, wouldn’t you say?

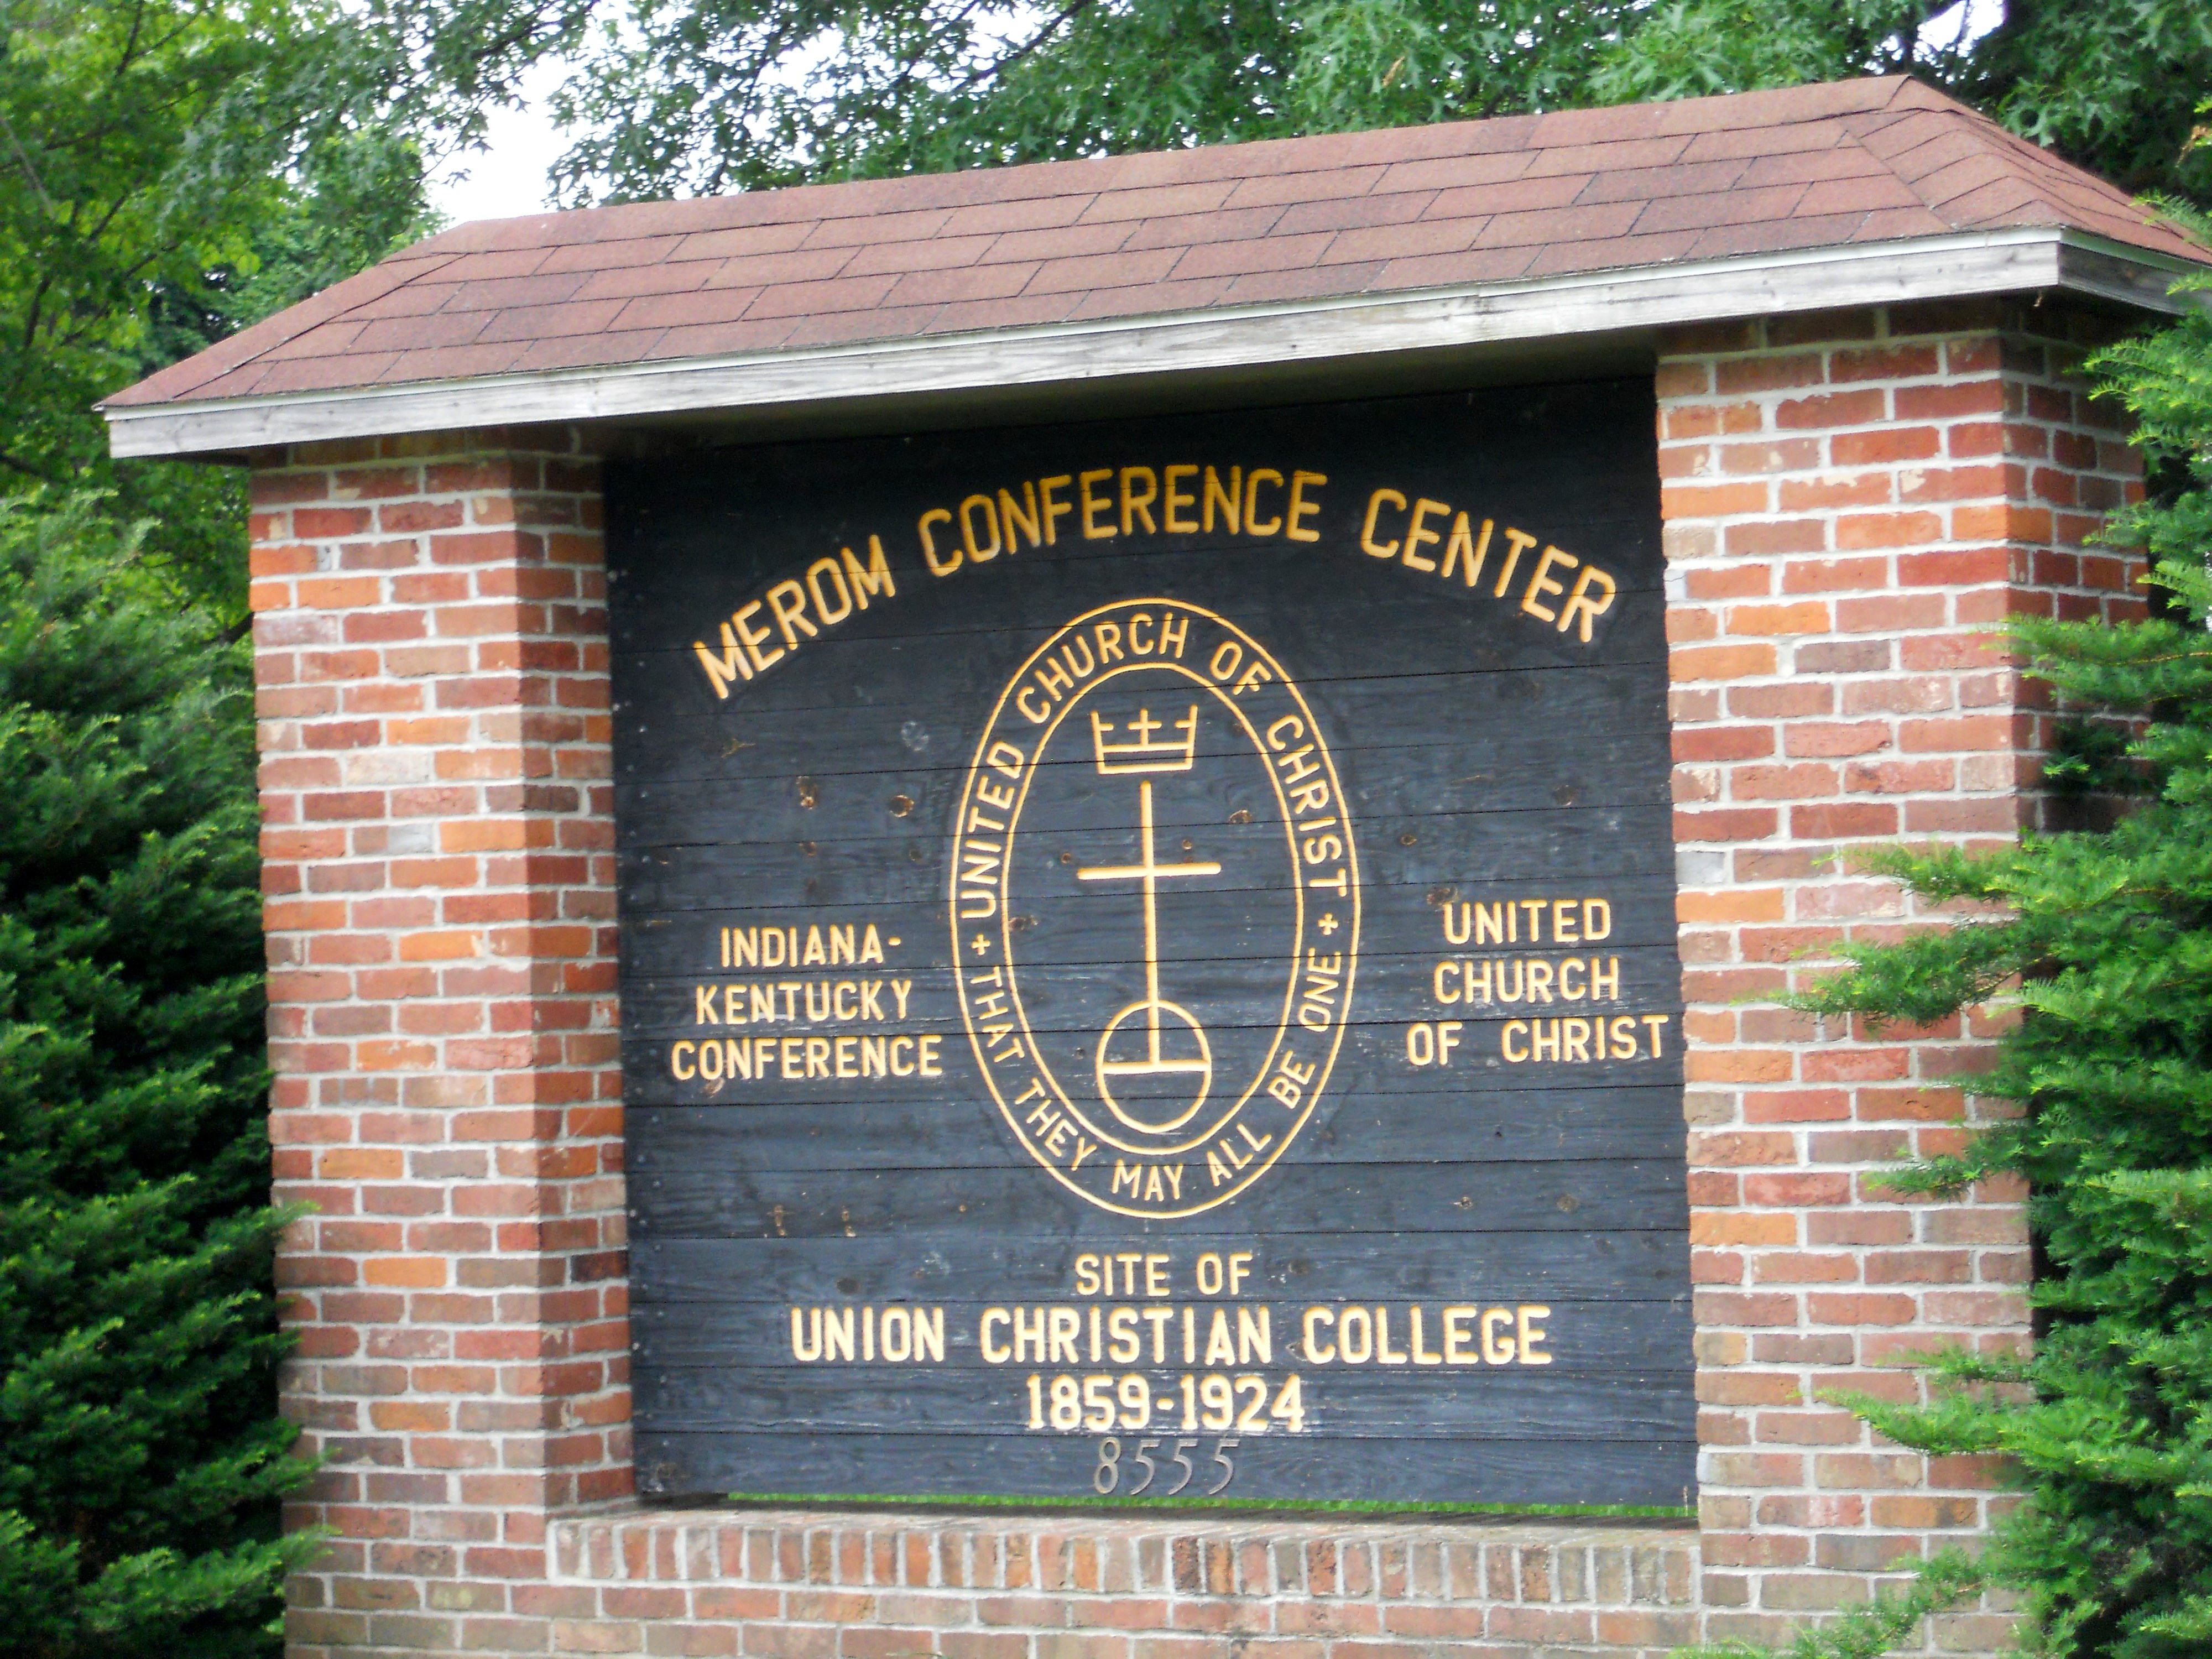
And when I turned around while standing pretty much in the same spot I photographed the BIG sign.

Image

I dare say there weren’t many Christian colleges in 1859! AND now, just to the right of this sign is the triumphant LONG lane that frames the main college building.

Image

Those are glassed in doors at the bottom front. Until recently the building had been vacant and vandalized. There was a news story about this building and it’s bell tower on one of our local (CBS) news stations prior to these doors being built. Fascinating interior. Alas, there’s no evidence of tours.

Image

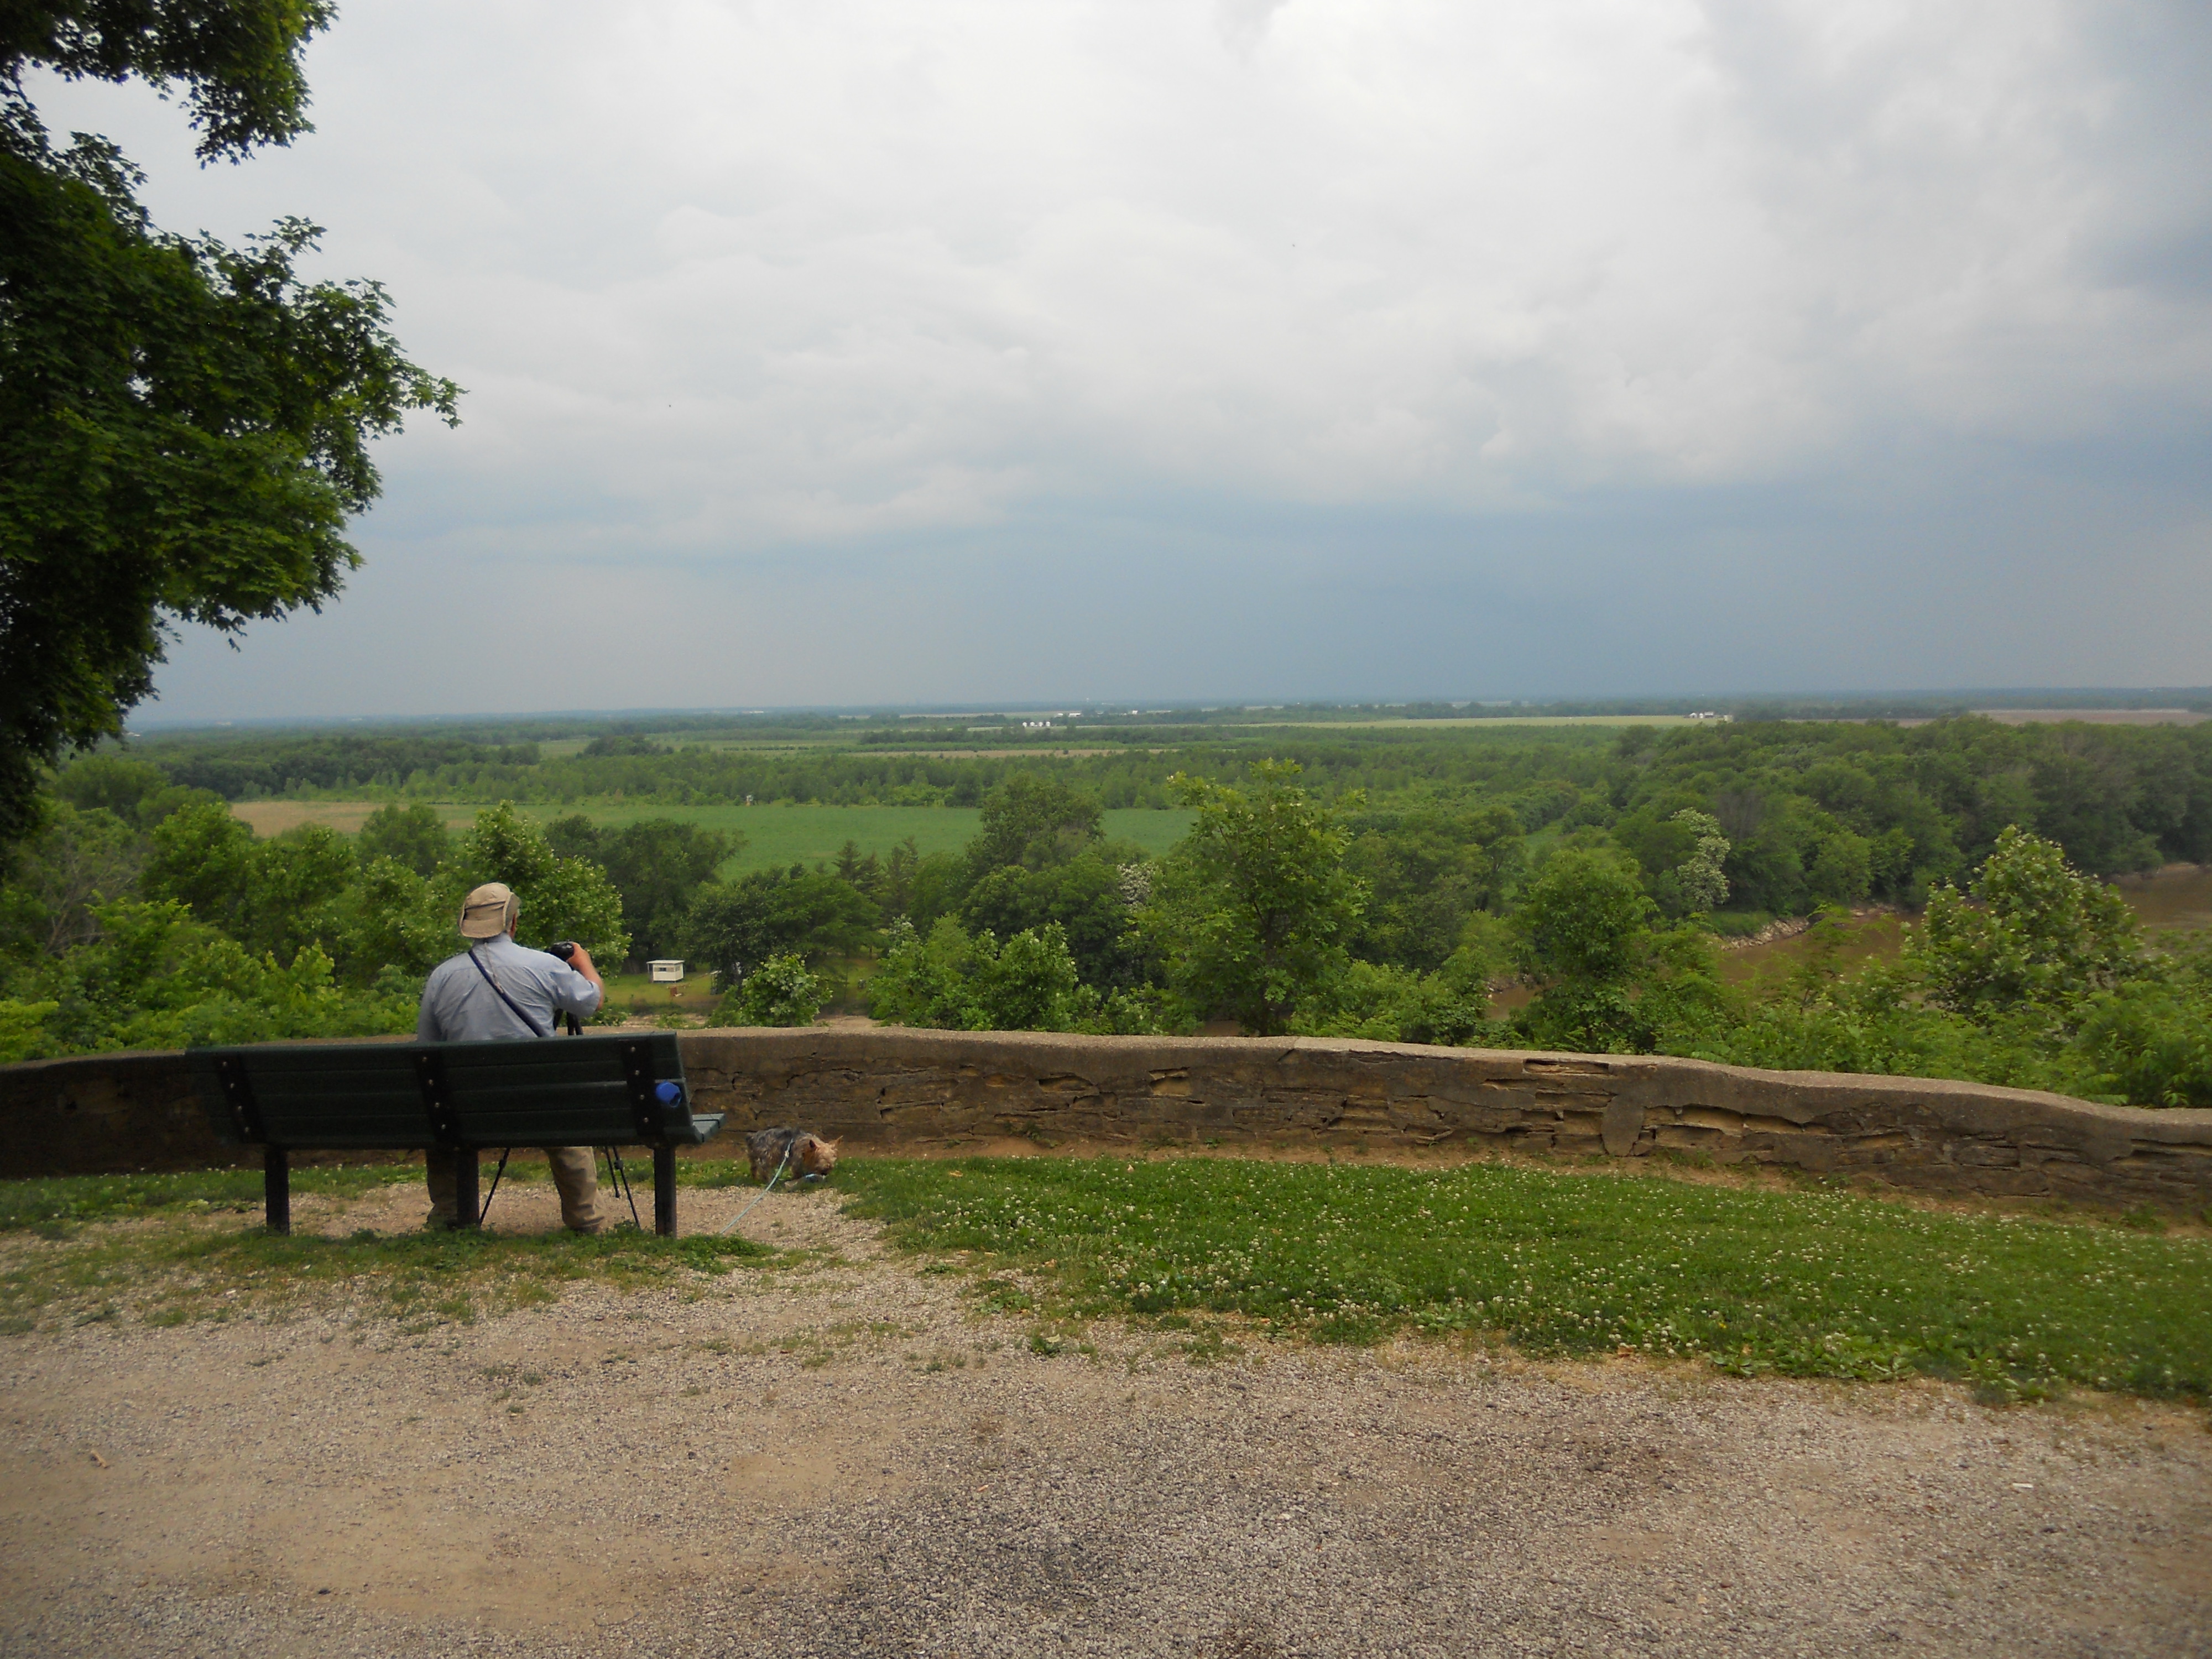
One last view. Very picturesque. This older gentleman was taking some finer photographs than I have capability. There’s that building across the river again. And the storm looming in the sky just to the right of the photo hits us as we leave for home.

I do so hope you have enjoyed day tripping by photo and blog with me. If you are ever in the area just shout across the river. I might hear you 🙂

Until next time (and I hope to be sooner than later)

~ Bonnie


Remembering our Veteran

How can a person say “Happy” Memorial Day when the memories can be so bittersweet? For some of us the memory is still quite raw. My family lost our Veteran just last August.

Image

He had been a quadriplegic since his accident in 1974 I believe. May have been 1973. I was there when we got the call. I was there a bit later when he came home. I have no photo to share of him strapped into a wheelchair, a Stryker frame drilled into his skull, and that also strapped to the wheelchair. He was jaundiced quite badly, emaciated. His neck and every bone downward had been broken. His spinal cord had been mostly severed. Yet he was determined to walk. And he did!

It wasn’t until several years later that I married him. We had an unusual life but good all the same. 12 years later, though, I was frustrated and stupid, and took our daughter and handed him a divorce. Even so, we remained friends. He still loved me. Truth be told, I still loved him too. He was a constant part of our lives for the next 17 years. We had talked to length and I was helping him to try and get a handicap equipped house. I was once again going to be his personal care giver.  After all those years, though, our government resources had failed him. He was struggling, looking quite emaciated once again. And then He got to celebrate the second greatest thing to ever happen in his life. (The birth of our daughter was the first 🙂  Our daughter had her first baby, our very first grandchild!

Image

One month later, shortly after coming to visit, he was killed, along with two other people in the other car that hit him head on.

Those memories of that day are ones that EVERY lover of veterans lost will know quite well. I can scarce share even now.

Image

The salutes from the local VFW chapter touched me deeply. He was so proud to have been a Soldier.

Image

Then the tears of seeing his Urn at the grave sight.  I never wanted to steal something and run as badly as I did at this moment.

Image

The twenty one gun salute. There were only 7 men available for this service so they fired 3 times each together. It was loud and amazing all at the same time. I was in a dream.

Image

And then our daughter was handed the flag that stood beside him throughout the funeral. Our son-in-law and His mother sit beside, with his mother holding our grandchild. His favorite hat lay in our girl’s lap. Some of His veteran friends can be seen standing at ease in the background. The Marine with the beard was to die just nine months later. The last thing the friend told his wife was that he was going to go see our Veteran.   😥

I personally took these photos. If they are blurred it is because they are seen through tears.

I am crying still.

Please, remember your Veteran this Memorial Day.

~  Bonnie


Painting in the Park

Image

Howdy Ya’ll!

Yesterday was a beautiful day here in South Eastern Illinois. I got stir crazy to get away from the apartment so this is what I decided to do. I took my dog and some painting projects to the conservation area north of where I live. As it turned out I was the only one there all day! I love being away from the hub-bub of the apartment and the “city”. Birds and frogs sang to me all afternoon.   🙂

Image

This conservation area is quite large, several hundred acres I believe. There are a few lakes and ponds for fishing and plenty of hunting. This area I settled into is the “park” area where there’s an easy access lake, the one shelter building, plenty of frisbie throwing space, and a couple of out houses. Yep, they still exist in my part of the world.    🙂     Since this is a primitive area I had to pack my own water. I’ll have to remember to bring more for the next time. Too bad there’s no camping allowed here. I could have stay for a couple days.

Image

My companion dog, Daisy, loves having the space to sniff and mosey. She tucked her tail in this pic because I had called for her and she thought she was in trouble. She never gets very far away from me. When she does she is always sure to keep me in her sight. Poor thing is 13 years old and doesn’t see as well now.  It’s nice here when nobody is around because I can let her off the leash. Of course, I seldom ever need to use the leash.

Image

Until the next time….enjoy your life! It’s the only one you have on this side of Jordan.   🙂

Bonnie


DIY-Dea…Picture Hanging

Howdy Ya’ll!

It dawned on me earlier today that I have failed to share my quirky DIY-deas for all of you that enjoy DIY. The old adage goes “Necessity is the Mother of Invention”. Believe me when I tell you that I am nearly an expert at this when it comes to my crafting and artwork. I can never seem to find what I need at the store. Even the simplest of items evade me! Soooo, I am always stuck having to “invent” or completely make my own items. Through much frustration and trial and error I thought I should share this one 🙂

I had been fussing on how to hang this jewelry/bow keeper that I’ve been working on for nearly two weeks. At first I had thought to rob an old sawtooth hanger from one of my many frames stash. Nope. They had all been pulled or the frames had the screw eyes and wire hanging option. (I always wonder WHY art galleries want this particular style of hanger when there’s so many more creative options!).

Then I thought, pooh, I’ll just go to the store. Huh. They only had huge ones or the type that you tap in with a hammer. Too big and not strong enough. THEN I thought fine, I’ll just buy a cheep frame and steel the hanger from that. Well, couldn’t find a small frame that had a sawtooth hanger! They were all either stand up frames or had those little triangle tags to hang by. Not good. I gave up for that day.

Then, this morning, inspiration hit when my eyes fell on a vintage purse I had hanging in the bathroom (yeah, stupid place for a purse to hang…).  The purse has a chain handle. I thought “what if I used chain to hang my art piece?”.  So I set out to scour through still more of my stash. This is what I found and confiscated for the greater good:

Image

It was a beast getting the other half of the chain off of it! Oh, I should tell you that this was a cheap bracelet I had previously either bought or somebody gave me. I am always picking up old jewelry to work with.   🙂

Then I went hunting for some screws. Before the kids moved me several years ago I could have found my stash in no time flat. Not so now. I have no idea where my jar of hardware has gone. Instead, I ravaged through junk drawers until I found screws that weren’t too long and that were “do-able”. Go figure….they wouldn’t fit through the chain! Sooo, back to the junk drawer. I finally settled for this:

Image

Doesn’t nearly everybody have some of these in the back of a junk drawer? The nails look huge in this photo…trust me, though, they aren’t that big. Perfect for my frame after checking to make sure they weren’t so long that they would poke out the front. They fit through the chain perfect and the head of the nail was just right for securing the chain without the chain pulling off. YAY!

So here is what it looks like. I did remember to make sure the chain had some give to it. Almost didn’t though. That would have been a tragedy!  My apologies for it being slightly out of focus….I think you can still see what I did with the chain.

Image

Are you curious to see what my finished piece looks like?  When it had it’s photo shoot I completely forgot to put a bow on   🙂 

I think you can fill in the blank. You are that creative with your mind, right? After all, we ARE DIY-er’s.

Here is the grand reveal:

Image

I will be listing this in my Etsy shop later. I sure hope you have enjoyed travelling with me through this DIY share.

Find me on Etsy here:   http://etsy.com/shop/peabuttonsmom


Until the next time….guard your fingers from the hammer!

Bonnie