Howdy Ya’ll!
It dawned on me earlier today that I have failed to share my quirky DIY-deas for all of you that enjoy DIY. The old adage goes “Necessity is the Mother of Invention”. Believe me when I tell you that I am nearly an expert at this when it comes to my crafting and artwork. I can never seem to find what I need at the store. Even the simplest of items evade me! Soooo, I am always stuck having to “invent” or completely make my own items. Through much frustration and trial and error I thought I should share this one 🙂
I had been fussing on how to hang this jewelry/bow keeper that I’ve been working on for nearly two weeks. At first I had thought to rob an old sawtooth hanger from one of my many frames stash. Nope. They had all been pulled or the frames had the screw eyes and wire hanging option. (I always wonder WHY art galleries want this particular style of hanger when there’s so many more creative options!).
Then I thought, pooh, I’ll just go to the store. Huh. They only had huge ones or the type that you tap in with a hammer. Too big and not strong enough. THEN I thought fine, I’ll just buy a cheep frame and steel the hanger from that. Well, couldn’t find a small frame that had a sawtooth hanger! They were all either stand up frames or had those little triangle tags to hang by. Not good. I gave up for that day.
Then, this morning, inspiration hit when my eyes fell on a vintage purse I had hanging in the bathroom (yeah, stupid place for a purse to hang…). The purse has a chain handle. I thought “what if I used chain to hang my art piece?”. So I set out to scour through still more of my stash. This is what I found and confiscated for the greater good:

It was a beast getting the other half of the chain off of it! Oh, I should tell you that this was a cheap bracelet I had previously either bought or somebody gave me. I am always picking up old jewelry to work with. 🙂
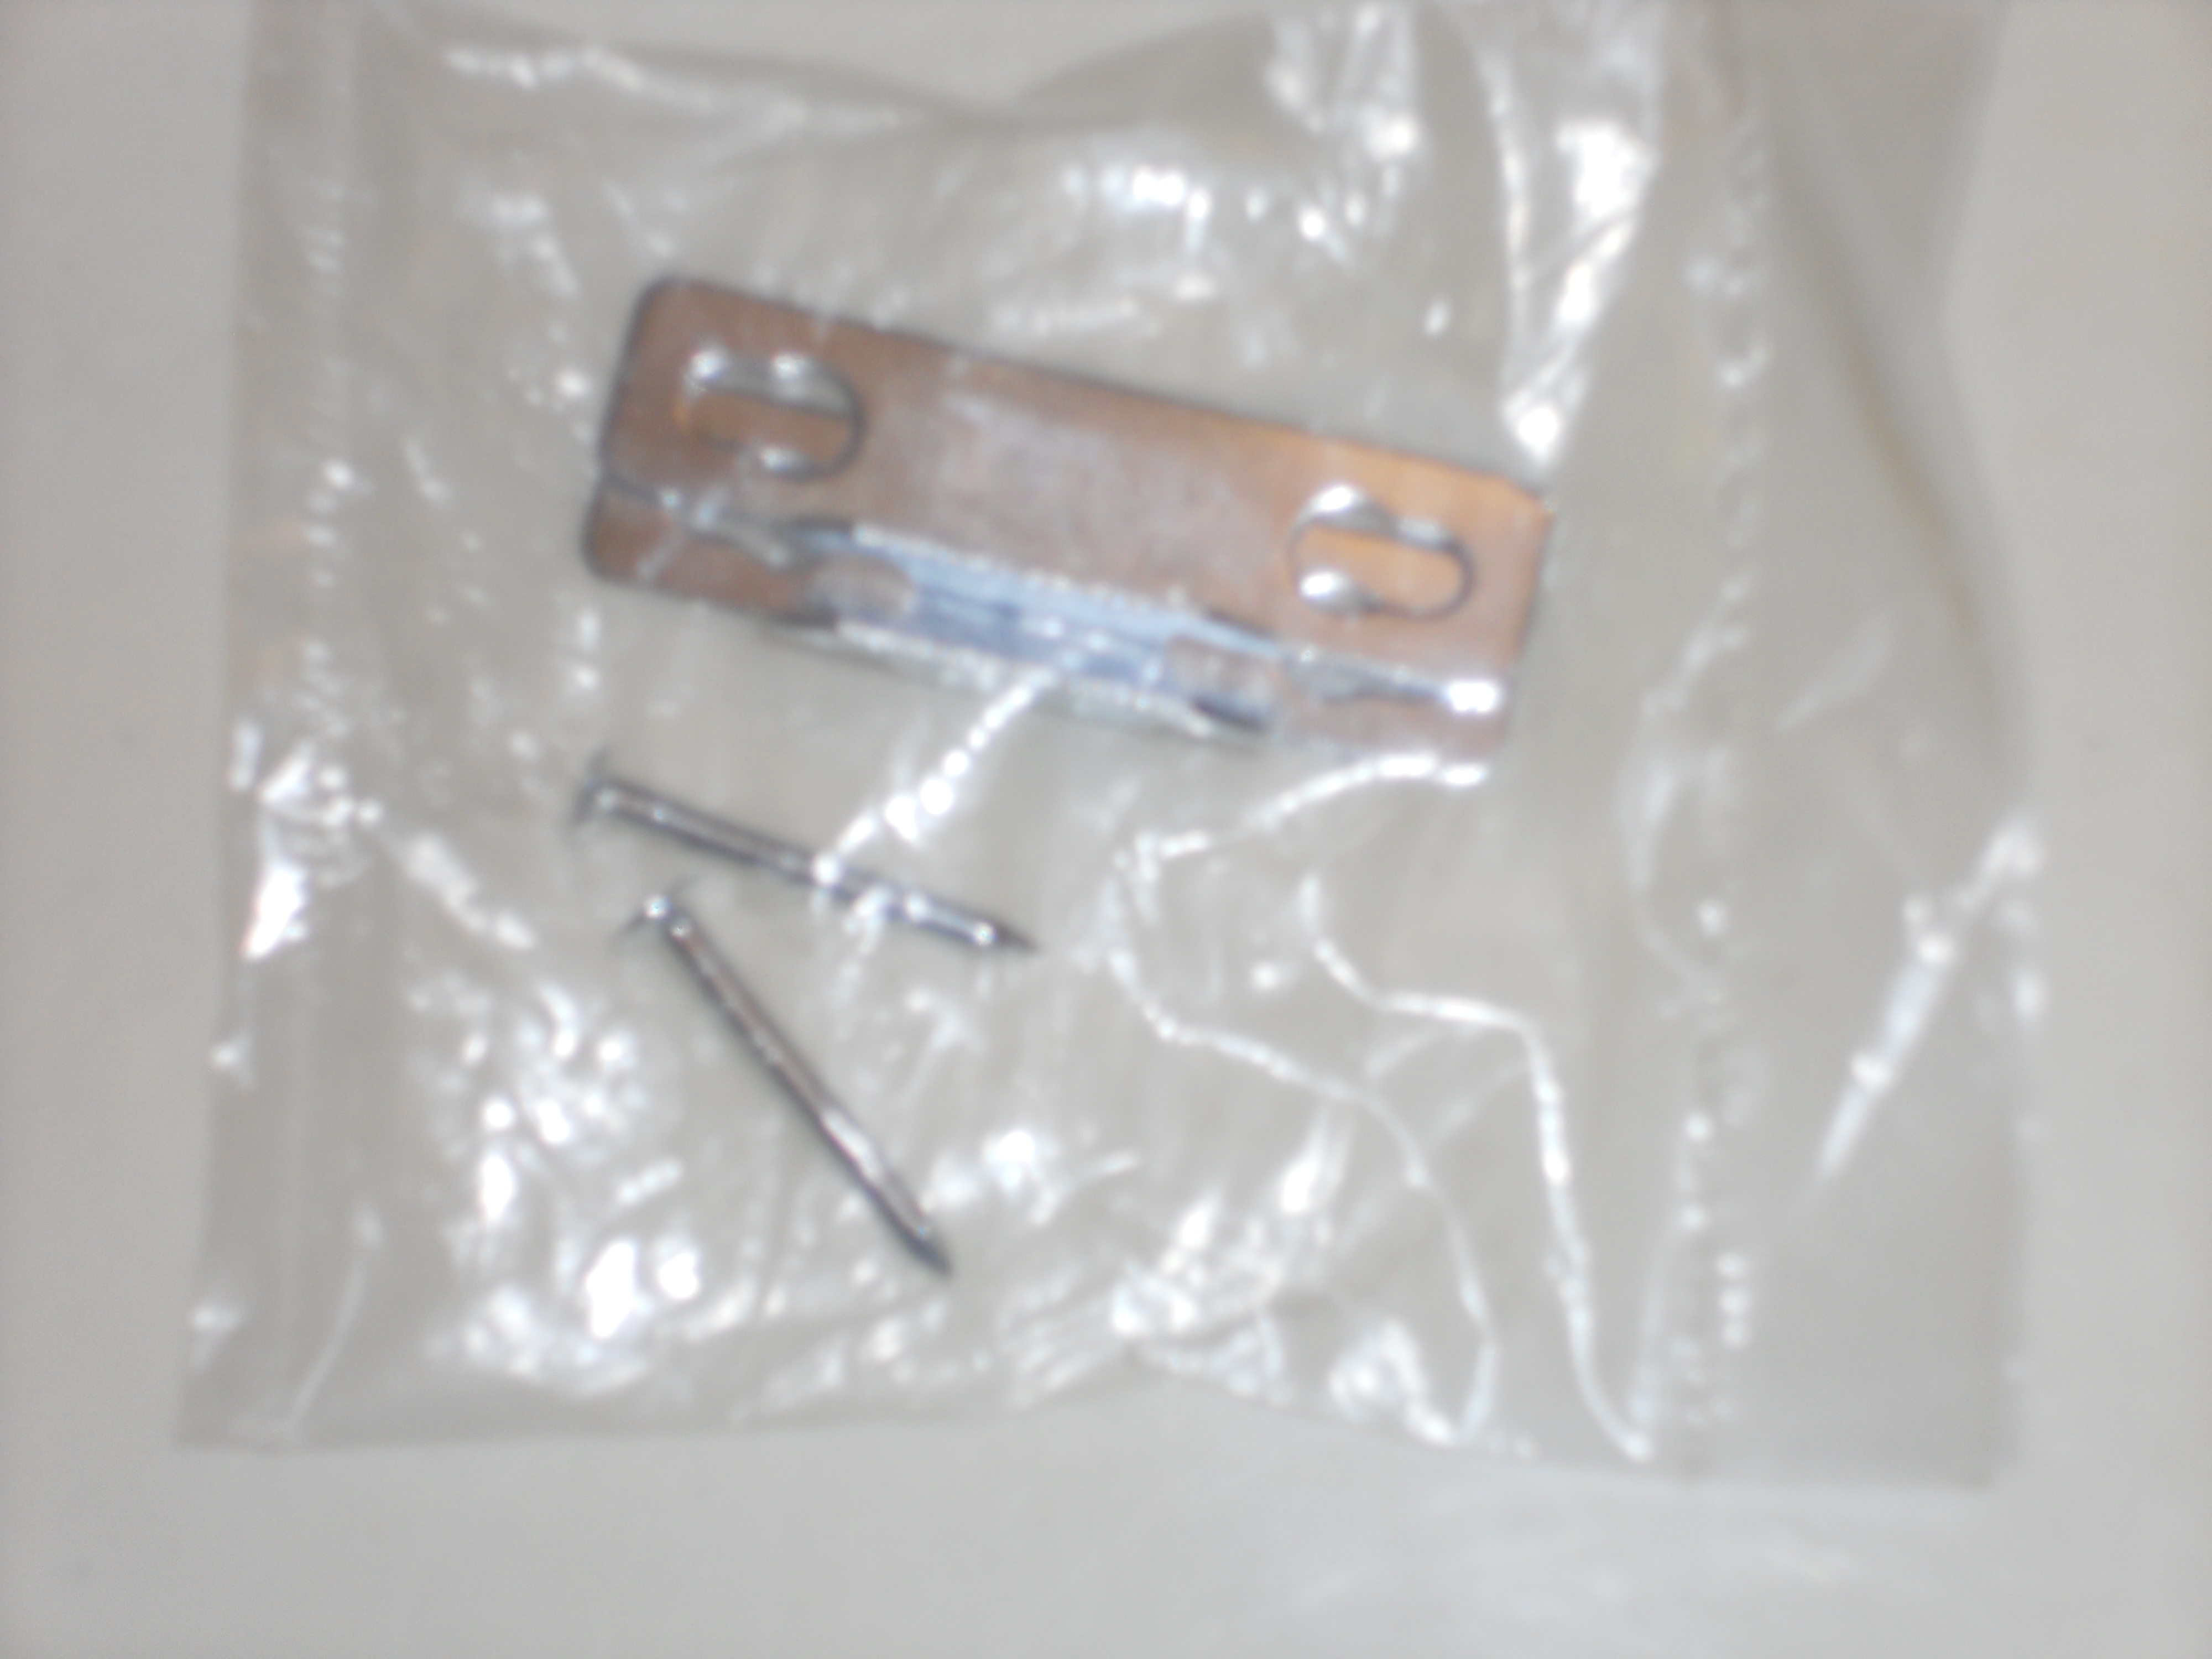
Then I went hunting for some screws. Before the kids moved me several years ago I could have found my stash in no time flat. Not so now. I have no idea where my jar of hardware has gone. Instead, I ravaged through junk drawers until I found screws that weren’t too long and that were “do-able”. Go figure….they wouldn’t fit through the chain! Sooo, back to the junk drawer. I finally settled for this:

Doesn’t nearly everybody have some of these in the back of a junk drawer? The nails look huge in this photo…trust me, though, they aren’t that big. Perfect for my frame after checking to make sure they weren’t so long that they would poke out the front. They fit through the chain perfect and the head of the nail was just right for securing the chain without the chain pulling off. YAY!
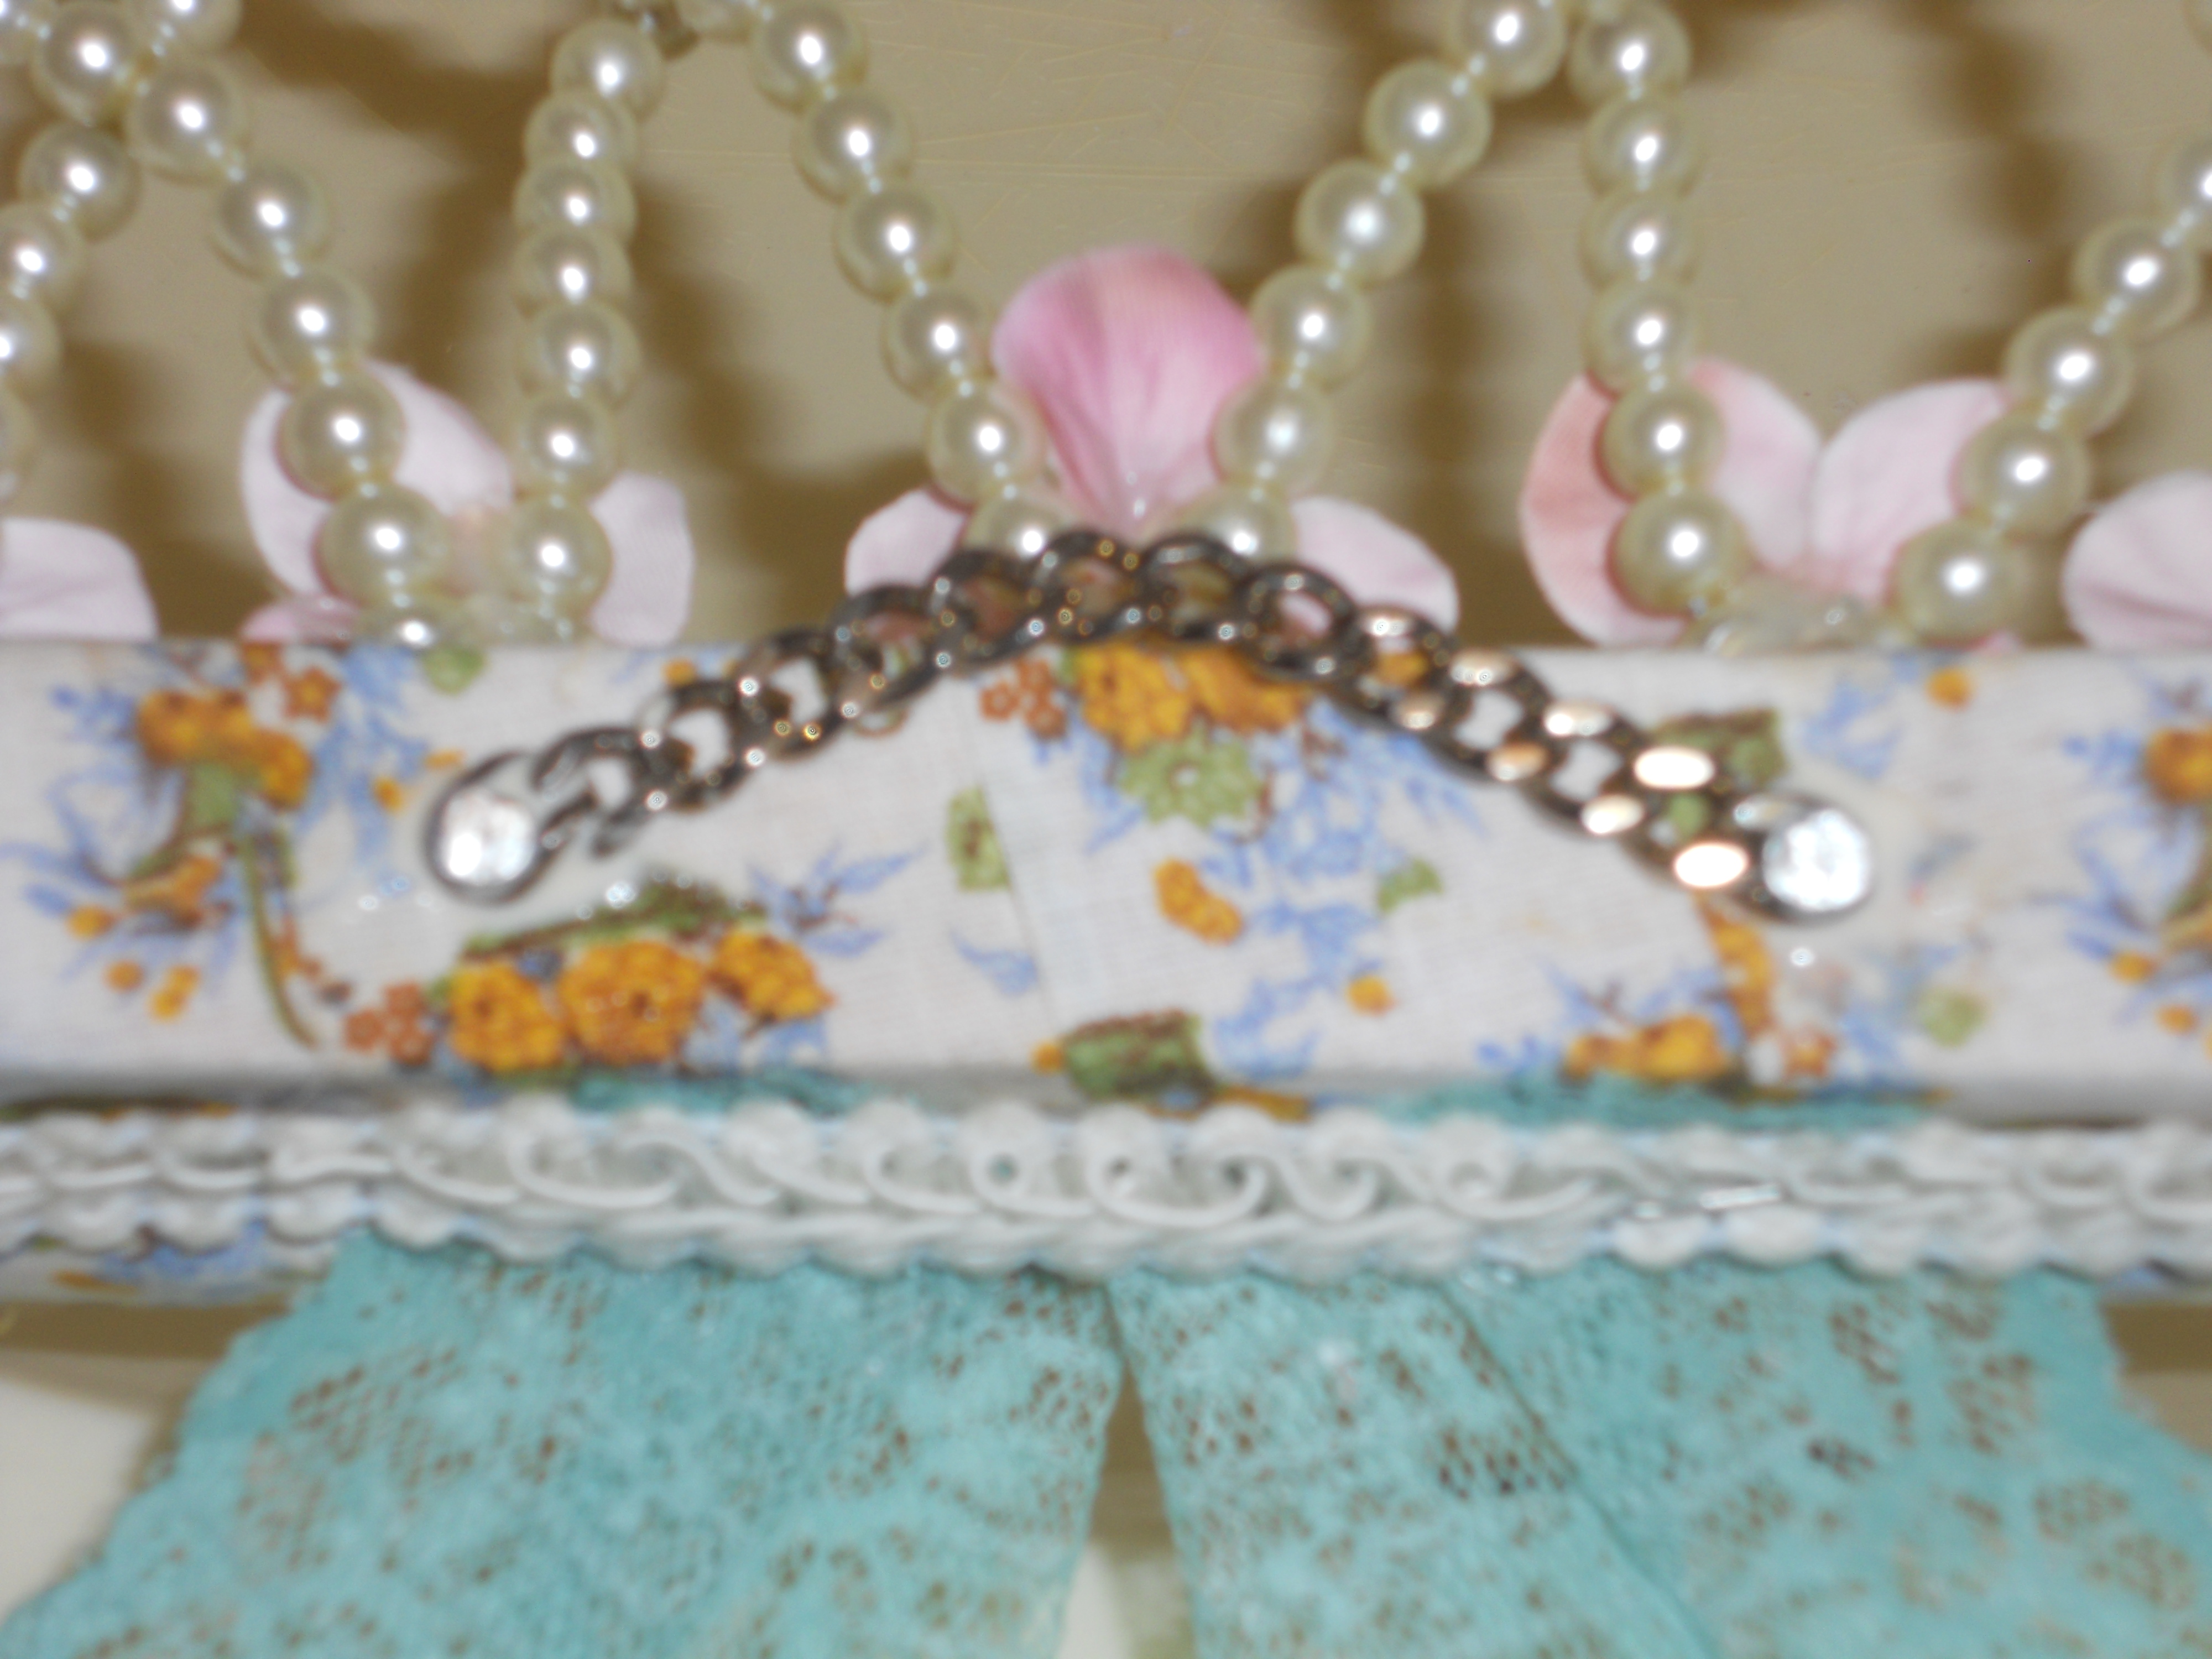
So here is what it looks like. I did remember to make sure the chain had some give to it. Almost didn’t though. That would have been a tragedy! My apologies for it being slightly out of focus….I think you can still see what I did with the chain.

Are you curious to see what my finished piece looks like? When it had it’s photo shoot I completely forgot to put a bow on 🙂
I think you can fill in the blank. You are that creative with your mind, right? After all, we ARE DIY-er’s.
Here is the grand reveal:

I will be listing this in my Etsy shop later. I sure hope you have enjoyed travelling with me through this DIY share.
Find me on Etsy here: http://etsy.com/shop/peabuttonsmom
Until the next time….guard your fingers from the hammer!
Bonnie


You must be logged in to post a comment.